Assessing Your Home’s Needs
Before diving into the nitty-gritty of home gas line installation process, it’s crucial to assess your home’s specific needs. Trust me, skipping this step can lead to headaches down the road! I remember when I first considered adding a gas stove; I thought it would be a simple task, but I quickly realized I needed to evaluate a few key factors first.
Determine the Location of Gas Appliances
- First things first, take a good look at where you want to install gas appliances. Are you planning to hook up a new gas stove, a dryer, or maybe even an outdoor grill? Knowing the exact locations will help you plan the route for your gas line. I once made the mistake of not measuring properly, and I ended up with a gas line that was too short. It was frustrating, to say the least!
Evaluate Existing Gas Lines and Their Capacity
- If your home already has gas lines, it’s essential to evaluate them. Are they in good condition? Do they have the capacity to handle additional appliances? You don’t want to overload your existing lines, as this can lead to pressure issues or even dangerous leaks. I learned this the hard way when I tried to add a gas fireplace without checking the existing line’s capacity. It’s always better to be safe than sorry!
Consider Future Gas Appliance Installations
- While you’re assessing your current needs, think ahead. Are there any other gas appliances you might want to install in the future? Planning for potential upgrades can save you time and money later on. I’ve seen friends who had to redo their gas lines because they didn’t consider future needs. It’s a hassle that can easily be avoided with a little foresight!
By taking the time to thoroughly assess your home’s needs, you’ll set yourself up for a smoother gas line installation process. It’s all about being prepared and ensuring that everything is in order before you start. So grab a pen and paper, jot down your appliance locations, and evaluate your existing gas lines. You’ll thank yourself later!
Obtaining Necessary Permits
When it comes to installing a gas line in your home, obtaining the necessary permits is a critical step that should never be overlooked. Trust me, skipping this part can lead to serious legal and safety issues down the line! I once thought I could get away with a quick DIY installation without permits, and boy, did I learn my lesson the hard way.
By taking the time to properly obtain permits and schedule inspections, you’re not only protecting yourself legally but also ensuring the safety of your home and family. It might feel like a hassle at the time, but these steps are crucial for a successful gas line installation.
Choosing the Right Materials
When it comes to gas line installation, selecting the right materials is crucial for ensuring safety, efficiency, and compliance with local regulations. I can’t stress enough how important this step is! I once tried to cut corners by using subpar materials, and it led to a mess that cost me more time and money in the long run.
By carefully selecting the right materials for your gas line installation, you’re setting yourself up for success. It may take a little extra time and research, but your safety and peace of mind are worth it.
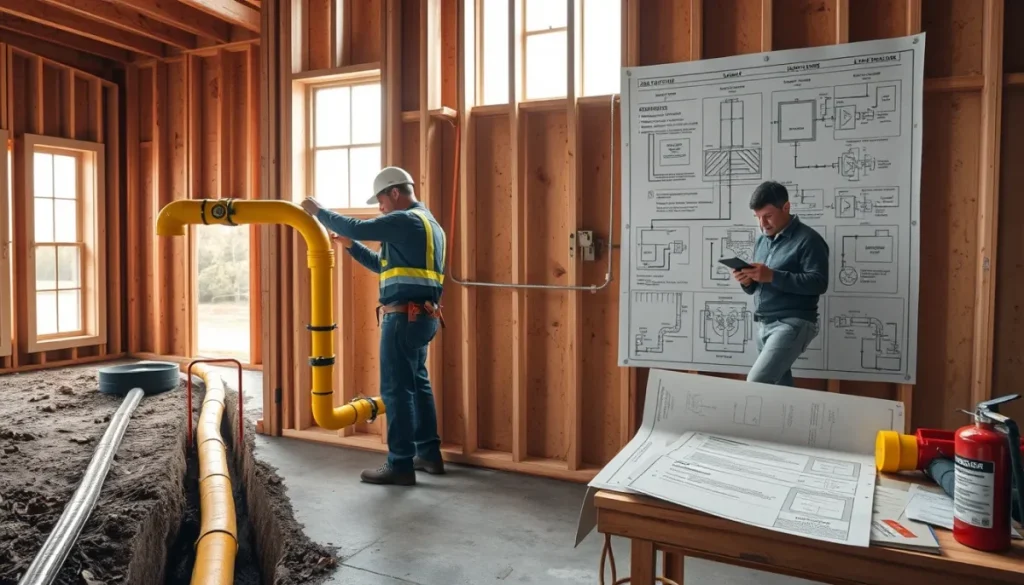
The Installation Process
Now that you’ve assessed your home’s needs, obtained the necessary permits, and chosen the right materials, it’s time to dive into the actual installation process. This is where the magic happens! However, I must emphasize that if you’re not experienced with gas line installation, it’s best to hire a licensed professional. That said, here’s a step-by-step guide to help you understand what the installation process entails.
Step 1: Turn Off the Gas Supply
Before you start, ensure that the gas supply is turned off. This is a critical safety measure! I remember the first time I attempted a gas line installation; I was so eager to get started that I almost forgot this crucial step. Always prioritize safety by shutting off the gas at the main valve.
Step 2: Measure and Cut Pipes to the Required Lengths
Once the gas is off, measure the lengths of pipe you’ll need for your installation. It’s essential to be precise here—too short, and you’ll have to start over; too long, and you’ll waste material. Use a pipe cutter to make clean cuts, ensuring that the ends are smooth and free of burrs. I learned that a good cut makes for a better connection!
Step 3: Clean and Deburr Pipe Ends
After cutting the pipes, it’s important to clean the ends. Use a deburring tool to remove any sharp edges or debris. This step helps ensure a secure and leak-free connection. I once skipped this step and ended up with a leak that could have been easily avoided. Trust me, taking the time to clean the pipes is worth it!
Step 4: Assemble the Gas Line
Now it’s time to assemble your gas line. Start by applying pipe dope (a type of thread sealant) to the threads of your pipe. This helps create a tight seal and prevents leaks. Carefully screw the pipes and fittings together, making sure they’re secure but not overly tight—over-tightening can damage the threads.
Step 5: Connect the Gas Line to Appliances
With the main line in place, it’s time to connect the gas line to your appliances. Use flexible connectors for this part, as they make it easier to attach the gas line to the appliance without stressing the connections. Make sure to install shutoff valves at each appliance for added safety. I always recommend double-checking that everything is secure before moving on.
Step 6: Check for Proper Ventilation
Before you finish up, ensure that there is proper ventilation for all gas appliances. This is crucial for safety and efficiency. I once neglected to check ventilation for a gas fireplace, and it led to some serious air quality issues. Make sure that your installation complies with local codes regarding ventilation.
By following these steps, you can successfully install a gas line in your home. Just remember, if at any point you feel unsure, don’t hesitate to call in a professional. Safety should always come first!
Testing for Leaks
After you’ve successfully installed your gas line and connected it to your appliances, it’s crucial to test the system for leaks. This step is non-negotiable! Gas leaks can pose serious safety hazards, including fires and explosions. I remember the first time I installed a gas line; I was so relieved when I learned how to properly test for leaks. Here’s how to do it safely and effectively.
Pressure Testing the Entire System
The first step in leak testing is to perform a pressure test on the entire gas line system. This involves sealing off the gas line and applying pressure to ensure that it can hold without any drops. You can use a pressure gauge to monitor the pressure levels. If you notice a drop in pressure, it indicates that there may be a leak somewhere in the system.
- Seal Off the System: Close all shutoff valves and ensure that all appliances are disconnected from the gas line.
- Attach the Pressure Gauge: Connect a pressure gauge to a test port on the gas line.
- Apply Pressure: Use a hand pump to apply pressure to the system, typically around 10-15 psi (pounds per square inch). Make sure to follow local codes for the specific pressure requirements.
- Monitor the Gauge: Keep an eye on the gauge for at least 15-30 minutes. If the pressure holds steady, you’re in the clear!
Using Soap Solution to Check for Leaks
In addition to pressure testing, you can use a soap solution to check for leaks. This is a simple and effective method! Here’s how it works:
- Prepare the Soap Solution: Mix a few drops of dish soap with water in a spray bottle or bowl.
- Apply the Solution: Spray or apply the soap solution to all joints, connections, and fittings in your gas line.
- Look for Bubbles: If there’s a leak, you’ll see bubbles forming at the site of the leak. This is a clear indication that you need to tighten the connection or replace the fitting.
I remember the first time I used this method; I was a bit nervous, but it was reassuring to see the bubbles at the connections. It gave me peace of mind knowing that I had thoroughly checked for leaks.
Importance of Addressing Leaks Immediately
If you do find a leak during your testing, it’s essential to address it immediately. Turn off the gas supply and fix the issue before proceeding. This may involve tightening connections, replacing fittings, or even redoing sections of the gas line. I once ignored a small leak thinking it would be fine, and it turned into a much bigger problem later on. Don’t make the same mistake!
By thoroughly testing your gas line for leaks, you’re ensuring the safety of your home and family. It’s a crucial step that should never be skipped. Once you’ve confirmed that everything is leak-free, you can move on to the final steps of your installation.
Final Steps and Safety Checks
Congratulations! You’ve successfully installed your gas line, connected it to your appliances, and tested for leaks. Now, it’s time to wrap things up with some final steps and safety checks. This part is just as important as the installation itself, ensuring that everything is safe and compliant for use. I can’t stress enough how crucial these checks are—trust me, they can save you from potential disasters down the road!
Schedule a Professional Inspection
- Once you’ve completed your installation and leak testing, the next step is to schedule a professional inspection. Many local jurisdictions require this to ensure that your installation meets all safety codes and regulations. A licensed inspector will review your work and provide you with the peace of mind that everything is up to standard. I once thought I could skip this step, but I quickly learned that having a professional check my work was invaluable. It’s better to be safe than sorry!
Install Carbon Monoxide Detectors
- Carbon monoxide (CO) is a colorless, odorless gas that can be deadly if not properly managed. After installing gas appliances, it’s essential to install carbon monoxide detectors in key areas of your home, especially near sleeping areas. These detectors can alert you to dangerous levels of CO, giving you time to evacuate and call for help. I remember the first time I installed a CO detector; it felt like a safety blanket for my family. It’s a small investment for peace of mind!
Educate Family Members on Gas Safety Practices
- Now that your gas line is installed and everything is checked, it’s time to educate your family about gas safety practices. Make sure everyone knows the signs of a gas leak, such as a rotten egg smell or hissing sounds. Teach them how to turn off the gas supply in case of an emergency. I always sit down with my family after any major installation to go over safety protocols. It’s a simple step that can make a big difference in ensuring everyone’s safety.
Regular Maintenance Checks
- Finally, don’t forget about regular maintenance checks. Schedule annual inspections of your gas lines and appliances to ensure they remain in good working order. This proactive approach can help catch any potential issues before they become serious problems. I’ve learned that staying on top of maintenance not only keeps my home safe but also extends the life of my gas appliances.
By following these final steps and safety checks, you can ensure that your gas line installation is not only successful but also safe for you and your family. It’s all about being proactive and responsible when it comes to gas safety.
FAQs
-
What materials are best for gas line installation?
The best materials for gas line installation include black iron pipe, copper pipe, and flexible corrugated stainless steel tubing.
-
How long does the gas line installation process take?
The duration of the installation process can vary based on the complexity of the project. Generally, it can take anywhere from a few hours to a couple of days. If permits and inspections are required, the entire process may extend to several weeks, depending on local regulations.
-
Can I install a gas line myself?
While some homeowners may have the skills to install a gas line themselves, it is highly recommended to hire a licensed professional. Gas line installation involves safety risks and must comply with local codes and regulations. A professional will ensure that the installation is done correctly and safely.
-
What are the signs of a gas leak?
Common signs of a gas leak include a strong smell of rotten eggs (due to the odorant added to natural gas), hissing or whistling sounds near gas lines, dead or dying vegetation around the gas line area, and physical symptoms like headaches or dizziness in your home. If you suspect a gas leak, evacuate immediately and contact your gas company.
-
How often should gas lines be inspected?
It is recommended to have gas lines inspected at least once a year. Regular inspections can help identify any potential issues before they become serious problems. Additionally, if you notice any changes in your gas appliances or experience any signs of a gas leak, you should have your gas lines inspected immediately.
Conclusion
Understanding the home gas line installation process is essential for any homeowner looking to add or upgrade gas appliances safely and efficiently. By following the steps outlined in this guide—from assessing your home’s needs and obtaining necessary permits to choosing the right materials and conducting thorough safety checks—you can ensure a successful installation that meets local regulations and keeps your family safe.
Remember, while some aspects of gas line installation can be handled as DIY projects, it’s always wise to consult with or hire a licensed professional when in doubt. Safety should always be your top priority!
If you’ve recently installed a gas line or have tips from your own experiences, we’d love to hear from you! Share your stories or any additional advice. Your insights could help fellow homeowners navigate their gas line installation projects with confidence!