In an era where water conservation is becoming increasingly crucial, greywater recycling stands out as a practical and eco-friendly solution for homeowners. As a professional plumber with years of experience in sustainable water systems, I’m excited to guide you through the process of setting up your own DIY greywater recycling system. This comprehensive guide is tailored for single-family homes with simple garden layouts and is perfect for homeowners with beginner-level plumbing skills.
Understanding Greywater Recycling
Before we dive into the nitty-gritty of installation, let’s understand what greywater recycling entails. Greywater is the relatively clean wastewater from household sources such as sinks, showers, and washing machines. Unlike blackwater, which comes from toilets and is heavily contaminated, greywater can be safely reused for irrigation purposes with minimal treatment.
According to the Environmental Protection Agency, the average American family uses more than 300 gallons of water per day at home, with a staggering 30% devoted to outdoor uses. Implementing a greywater recycling system can significantly reduce this consumption, leading to both environmental and economic benefits.
Benefits of Greywater Recycling
- Water Conservation: By reusing greywater, you can reduce your freshwater consumption by up to 30%.
- Cost Savings: Lower water bills and reduced strain on municipal water treatment facilities.
- Nutrient Recycling: Greywater often contains nutrients that can benefit your garden.
- Environmental Impact: Reduces the load on septic systems and municipal treatment plants.
- Groundwater Recharge: Helps replenish groundwater when used for landscape irrigation.
Planning Your Greywater Recycling System
Before you start gathering materials and tools, it’s essential to plan your greywater recycling system carefully. This planning phase will ensure that your system is efficient, compliant with local regulations, and suitable for your specific needs.
Assess Your Water Usage
Begin by evaluating your household’s water consumption patterns. Keep a log of how much water you use for showers, laundry, and sinks over a week. This data will help you determine the potential volume of greywater you can recycle and the size of the system you’ll need.
Survey Your Garden
Next, assess your garden’s layout and irrigation needs. Consider factors such as:
- Garden size and shape
- Types of plants and their water requirements
- Soil type and drainage characteristics
- Slope and topography of the land
This information will guide your decisions on pipe layout, distribution methods, and potential storage needs.
Check Local Regulations
Greywater recycling systems are subject to various regulations that can differ significantly between jurisdictions. Before proceeding with installation, research and understand:
- Local plumbing codes
- Permit requirements
- Health department regulations
- Environmental protection guidelines
Many areas require permits for greywater systems, and some may have restrictions on how greywater can be used. Ensuring compliance from the start will save you headaches down the line.
Components and Materials for Greywater Recycling
To set up an effective greywater recycling system, you’ll need the following components:
- 3-way Diverter Valves: These allow you to switch between sending water to the sewer and your greywater system.
- PVC Pipes: 1.5″ to 2″ diameter pipes for indoor plumbing.
- UV-Resistant Piping: For outdoor sections exposed to sunlight.
- Filtration Unit: A mesh screen or sand filter to remove larger particles.
- Surge Tank (optional): A 50-100 gallon tank to manage flow during peak usage.
- Pipe Fittings and Connectors: Various elbows, T-joints, and couplings.
- Pipe Hangers and Supports: To secure piping along its route.
- Plumber’s Tape and Pipe Cement: For sealing connections and joints.
- Distribution System: Perforated pipes or drip irrigation components for the garden.
- Backflow Preventers: To protect potable water sources from contamination.
- Labeling Materials: For clear identification of greywater components.
Step-by-Step Installation Guide for Greywater Recycling
Now that we’ve covered the basics and gathered our materials, let’s walk through the installation process step by step.
Identify Greywater Sources
The first step in setting up your greywater recycling system is to identify suitable sources. In most homes, these include:
- Bathroom sinks and showers
- Washing machines
- Kitchen sinks (with caution due to higher organic content)
Locate the drain pipes for these fixtures, as these will be the connection points for your greywater system.
Plan Your Layout
With your sources identified, map out the route your greywater will take from these points to your garden. Consider the following:
- Shortest possible route to minimize piping
- Adequate slope for gravity-fed systems (minimum 1/4″ per foot)
- Avoiding obstacles like foundations or other utilities
- Access points for maintenance and cleaning
Sketch out your plan, including the location of diverter valves, filtration units, and distribution points in the garden.
Install Diverter Valves
Diverter valves are crucial components in your greywater recycling system. They allow you to switch between sending water to the sewer and your greywater system. Here’s how to install them:
- Shut off the main water supply to your home.
- Locate the drain pipe for each greywater source.
- Cut into the existing drain pipe, allowing space for the diverter valve.
- Install the 3-way diverter valve, ensuring proper orientation.
- Use plumber’s tape on threaded connections to prevent leaks.
- Secure the valve and test for leaks before proceeding.
Set Up Filtration
Filtering greywater is essential to remove hair, lint, and other particles that could clog your system. Install a filtration unit after each diverter valve:
- Choose between a mesh screen filter or a sand filter based on your needs and maintenance preferences.
- Install the filter in an easily accessible location for regular cleaning.
- Ensure proper connections to both the incoming greywater pipe and the outgoing filtered water pipe.
- Consider installing a bypass valve to allow for filter maintenance without disrupting the system.
Connect Piping
Now it’s time to connect your greywater sources to the filtration unit and eventually to your garden:
- Use 1.5″ to 2″ PVC pipes for indoor sections.
- Maintain a slight downward slope (1/4″ per foot) to ensure proper flow.
- Install pipe hangers every 4-6 feet to support the piping.
- Use appropriate fittings and connectors at turns and junctions.
- Apply pipe cement to all connections to ensure a watertight seal.
Add a Surge Tank (Optional)
A surge tank can help manage flow during peak usage times:
- Install the tank after the filtration unit.
- Ensure the tank is elevated to allow for gravity flow to the garden.
- Include an overflow pipe connected to the sewer line for safety.
- Install a pump if necessary to move water from the tank to higher elevation areas in your garden.
Outdoor Piping
As you transition to outdoor areas, switch to UV-resistant piping to prevent degradation from sunlight:
- Dig trenches at least 6″ deep to protect pipes from lawn equipment.
- Use proper backfilling techniques to support the pipe and prevent settling.
- Install cleanouts at key points to allow for future maintenance.
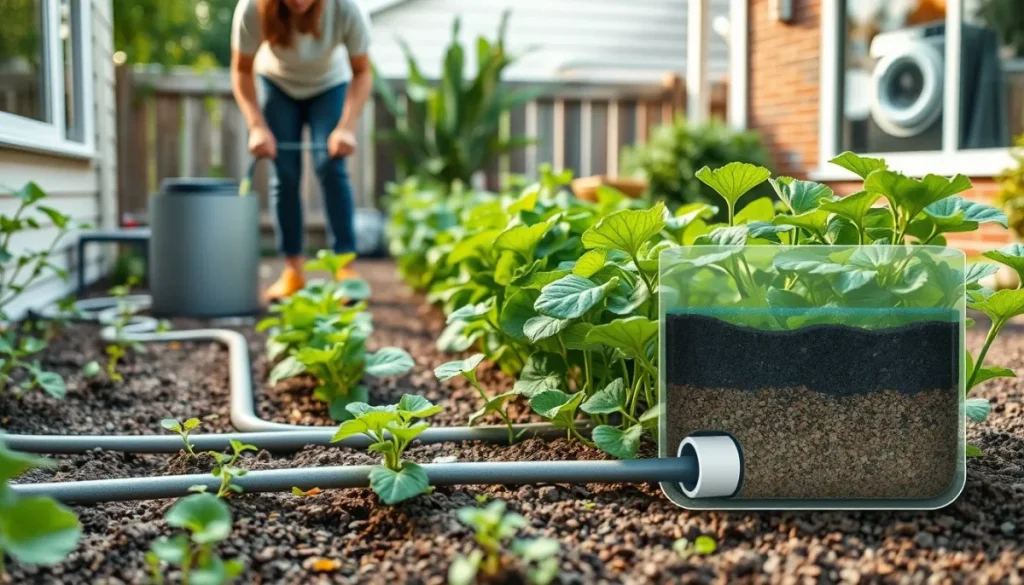
Create Distribution Points
The final step in your greywater recycling system is setting up distribution in your garden:
- Install multiple outlet points throughout your garden based on your irrigation needs.
- Use perforated pipes or drip irrigation systems for even water distribution.
- Consider using mulch basins around plants to help filter and distribute greywater.
- Ensure that greywater is not sprayed or allowed to pool on the surface to prevent potential health risks.
Test the System
Before declaring your greywater recycling system operational, thorough testing is crucial:
- Open diverter valves and run water through each source.
- Check for leaks at all connections and joints.
- Verify proper flow through the filtration system and into the garden.
- Test the distribution system to ensure even water dispersal.
- Make any necessary adjustments to improve flow or distribution.
Label and Educate
Proper labeling and education are vital for the safe operation of your greywater recycling system:
- Clearly label all components of the greywater system.
- Use purple pipe or tape to indicate non-potable water lines.
- Educate all household members on system use and maintenance.
- Create a simple manual or guide for future reference.
Compliance and Safety in Greywater Recycling
Ensuring your greywater recycling system is safe and compliant with local regulations is paramount. Consider the following:
- Backflow Prevention: Install backflow preventers to avoid contamination of potable water sources.
- Storage Limitations: Never store greywater for more than 24 hours to prevent bacterial growth.
- Appropriate Use: Avoid using greywater on root vegetables or edible portions of plants.
- Regular Maintenance: Establish a routine for cleaning filters and inspecting the system.
- Signage: Post signs indicating the use of greywater in your garden.
Troubleshooting Common Greywater Recycling Issues
Even well-designed greywater recycling systems can encounter problems. Here are some common issues and their solutions:
- Clogged Pipes:
- Cause: Accumulation of hair, lint, or soap residue.
- Solution: Regular cleaning and potentially installing additional filters.
- Odors:
- Cause: Stagnant water or bacterial growth.
- Solution: Ensure proper slope for complete drainage and consider adding a biofilter.
- Uneven Distribution:
- Cause: Blockages or poor system design.
- Solution: Clean distribution points and adjust flow rates.
- Overflowing Surge Tank:
- Cause: Excessive water input or blocked outflow.
- Solution: Adjust inflow, clean outflow pipes, or increase tank capacity.
- Plant Stress:
- Cause: Incompatible soap residues or pH imbalance.
- Solution: Use plant-friendly, biodegradable soaps and monitor soil pH regularly.
Maintaining Your Greywater Recycling System
Regular maintenance is key to the longevity and efficiency of your greywater recycling system:
- Weekly Tasks:
- Inspect visible pipes and connections for leaks.
- Check and clean filters if necessary.
- Monthly Tasks:
- Flush the entire system with fresh water.
- Inspect and clean the surge tank if installed.
- Quarterly Tasks:
- Check and adjust pH levels in the soil.
- Inspect and clean distribution points in the garden.
- Annual Tasks:
- Conduct a comprehensive system inspection.
- Replace any worn components.
- Review and update your system manual.
FAQs
To address common concerns and enhance engagement, here are some frequently asked questions about greywater recycling:
Q: Can I use kitchen sink water in my greywater recycling system?
A: While possible, it’s generally not recommended due to the high organic content and potential grease buildup. If you choose to include kitchen sink water, additional filtration and more frequent maintenance will be necessary.
Q: How often should I clean the filtration unit in my greywater recycling system?
A: Clean or backwash filters monthly or when you notice reduced flow. However, this may vary depending on your water usage and the type of filter installed.
Q: Can I use greywater recycling during winter?
A: In cold climates, it’s advisable to divert greywater to the sewer during winter to prevent freezing. Some systems can be designed with freeze protection, but this adds complexity and cost.
Q: Will greywater recycling harm my plants?
A: When done correctly, greywater recycling can benefit plants. However, it’s important to use plant-friendly soaps and avoid applying greywater directly to edible portions of plants.
Q: How much water can I save with a greywater recycling system?
A: Depending on your household’s water usage and the size of your system, you can save up to 30% of your total water consumption through greywater recycling.
Conclusion: Embracing Sustainable Water Use Through Greywater Recycling
Setting up a greywater recycling system is more than just a home improvement project; it’s a step towards a more sustainable lifestyle. By reusing water that would otherwise go to waste, you’re not only reducing your water bill but also making a positive impact on the environment.
Remember, every drop counts. Your efforts in implementing greywater recycling contribute to water conservation on a larger scale. As you enjoy your lush, sustainably-watered garden, take pride in knowing you’re part of the solution to water scarcity.
By implementing greywater recycling in your home, you’re not just creating a more efficient household; you’re setting an example for your community and future generations. So roll up your sleeves, gather your tools, and get ready to transform your home into a model of water sustainability!