When it comes to home improvement projects, installing a kitchen sink might seem intimidating at first. However, with the right set of DIY kitchen sink installation tools and a bit of guidance, this task becomes much more manageable—even for a beginner. Having the correct tools can be the difference between a smooth, hassle-free installation and a frustrating experience filled with leaks and extra trips to the hardware store. If you’ve ever tried to “make do” with the wrong tools, you know how important this step is!
Whether you’re replacing an old sink, installing a new one during a kitchen renovation, or upgrading to a more modern design, understanding which kitchen sink installation tools you need is the first step. Skimping on tools can lead to improperly sealed plumbing, uneven sinks, or worse—water damage that creeps up long after the installation is complete. This is why it’s crucial to gather the right equipment from the beginning to avoid mishaps and ensure your sink is installed correctly.
This guide will walk you through the essential kitchen sink installation tools you need for a successful project, along with tips on choosing high-quality tools, avoiding common mistakes, and keeping safety in mind. By the end of this article, you’ll have everything you need to confidently tackle your kitchen sink installation like a pro.
Why Having the Right Tools Matters for DIY Sink Installations
When it comes to DIY kitchen sink installations, the tools you use can make or break the entire process. Think of it this way: trying to install a kitchen sink without the proper kitchen sink installation tools is like attempting to bake a cake without an oven. Sure, you could try some workarounds, but the result is unlikely to meet your expectations.
First, using the correct DIY kitchen sink installation tools ensures precision during installation. Plumbing requires exact measurements and perfectly sealed connections to avoid leaks. For example, without a basin wrench, you’ll struggle to reach those tight spots under the sink when securing the faucet or drain connections. Or consider attempting to remove the old sink with just a standard wrench—good luck reaching into those cramped, awkward spaces!
Second, the right tools help prevent damage. Plumbing parts are often delicate, and overtightening or using the wrong wrench size can strip threads or crack fittings, leading to expensive repairs. A properly installed sink requires that all connections are tight enough to prevent leaks but not so tight that they damage the pipes or fixtures. Using tools like an adjustable wrench or Teflon tape helps achieve that delicate balance, ensuring your fittings are secure without being overdone.
Finally, having the right kitchen sink installation tools saves you time and frustration. When you have the proper tools at hand, the job flows more smoothly. There’s no need to stop midway through to run to the store, and you can avoid the trial-and-error of using makeshift solutions. For example, using a level for your kitchen sink installation ensures your sink is perfectly straight the first time, so you won’t have to deal with water pooling in one area or a lopsided look.
In short, the right tools not only make the job easier but also ensure a professional-quality installation. With this foundation in place, let’s look at the specific DIY kitchen sink installation tools you’ll need.
The Essential Tools for DIY Kitchen Sink Installation
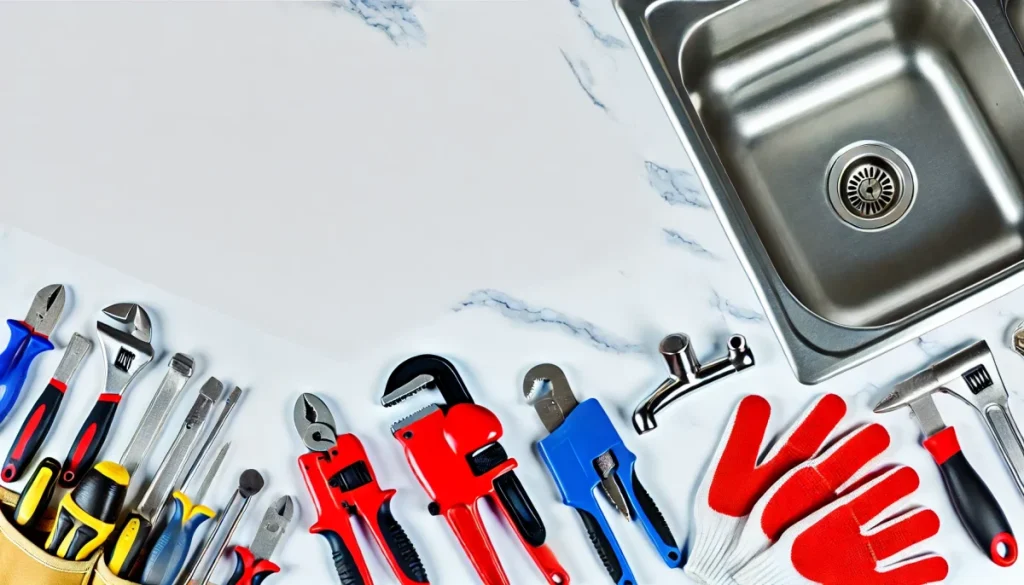
Before you start any project, assembling the right kitchen sink installation tools is critical. Here’s a list of the must-have tools that every DIYer should gather before installing a kitchen sink:
- Adjustable Wrench
The adjustable wrench is a versatile tool that allows you to tighten or loosen nuts and bolts of varying sizes. It’s essential for connecting water supply lines to the faucet and securing the sink’s mounting brackets. Make sure the wrench you choose is sturdy enough to handle the tight space under the sink. - Basin Wrench
A basin wrench is designed for one specific task: tightening or loosening nuts in tight spaces under sinks. It has a long handle and a swiveling jaw, which allows you to reach behind the sink where a regular wrench won’t fit. Without a basin wrench, you’ll find it nearly impossible to attach the faucet correctly, especially in cramped conditions. - Plumber’s Putty
This soft, moldable compound is used to create watertight seals around drains and faucets. When installing a new sink, apply plumber’s putty around the drain flange to prevent leaks. It’s an inexpensive yet vital material that should never be skipped in your kitchen sink installation tools. - Silicone Sealant
Silicone sealant is used to create a waterproof barrier around the edges of the sink where it meets the countertop. A proper seal prevents water from seeping under the sink and damaging your cabinetry. Unlike plumber’s putty, silicone is flexible and designed to withstand water exposure over time. - Tape Measure
Proper measurements are crucial to ensuring your new sink fits correctly. A tape measure helps you accurately measure the dimensions of the sink cutout, the distance between plumbing connections, and the overall fit of the sink within the countertop. - Level
It’s important that your sink is perfectly level, or you’ll face drainage issues and an uneven appearance. A small level will help you ensure that the sink sits flush against the countertop without any tilting. - Screwdriver (Flathead & Phillips)
Depending on the sink’s design, you’ll need a screwdriver to secure the mounting clips that hold the sink in place. Some sinks use flathead screws, while others use Phillips, so it’s a good idea to have both types on hand. - Bucket
When you’re disconnecting the old plumbing, there’s always some water left in the pipes. A bucket will catch any remaining water and prevent spills under your sink. It’s a simple but effective tool that many DIYers overlook in their collection of DIY kitchen sink installation tools. - Utility Knife
A utility knife comes in handy for cutting through old caulking and sealant when removing the old sink. It’s also useful for trimming excess silicone after installing the new sink to give the seal a clean, professional look.
These tools are essential for a successful DIY kitchen sink installation. Without them, you risk an incomplete installation that could result in leaks, poor alignment, or even costly repairs. The next section covers more specialized DIY kitchen sink installation tools that may be needed for specific installations.
Specialty Tools for More Complex Installations
While the basic tools are sufficient for most kitchen sink installations, some scenarios require specialty tools. If you’re working with a more complex setup—such as retrofitting a farmhouse sink into a non-standard countertop, or adjusting plumbing that doesn’t align properly—you’ll want to have these specialty DIY kitchen sink installation tools in your toolbox as well.
- Jigsaw
A jigsaw is a handy tool if you need to adjust the sink cutout in the countertop. For instance, if you’re replacing an old sink with a larger or differently shaped one, the existing hole might not fit the new model. A jigsaw allows you to make precise cuts in materials like wood or laminate countertops, ensuring a perfect fit for the sink. - Teflon Tape
Also known as plumber’s tape, Teflon tape is used to create a watertight seal on threaded plumbing connections, such as those on water supply lines. Wrapping the threads with Teflon tape helps prevent leaks and ensures a snug fit when attaching the pipes to the faucet or drain. - Pipe Cutter
Sometimes, the existing pipes under the sink need to be trimmed to fit the new configuration, especially if you’re adding or relocating plumbing fixtures. A pipe cutter makes clean, straight cuts in both plastic and metal pipes. It’s an essential tool for modifying the water supply or drain lines to fit a new sink. - Pliers
A sturdy set of pliers is useful for gripping and turning small parts that are difficult to handle with your fingers. Whether you’re tightening fittings or pulling out old plumbing components, pliers provide the leverage you need for a secure grip in tight spaces.
These specialty DIY kitchen sink installation tools aren’t always required, but they can be a lifesaver if you run into complications during the installation. Having them on hand can save you from unnecessary frustration, especially if you’re dealing with an older kitchen setup where pipes and countertops may not align perfectly with modern fixtures.
How to Choose Quality Tools That Last
Investing in high-quality tools is essential, especially if you plan on taking on more DIY projects in the future. Poorly made tools can break, strip screws, or fail to provide the precision you need. Here’s how to make sure the tools you choose will stand the test of time:
- Material Matters
Look for tools made from durable materials, like stainless steel or heavy-duty plastic. These materials resist rust and corrosion, which is especially important for plumbing tools that are frequently exposed to water. - Comfortable Grips
Installing a sink involves spending time in awkward positions under the sink, and you’ll be handling your tools for extended periods. Tools with comfortable, ergonomic grips reduce hand fatigue and give you better control over the task at hand. Rubberized handles are a great feature to look for. - Avoid Cheap Knockoffs
It can be tempting to grab the cheapest toolset you can find, but these tools often fall short in quality. Cheap tools may break or wear out after just a few uses, and they could end up costing you more in the long run if you have to replace them repeatedly. It’s better to invest in a mid-range or high-quality toolset that will last for years. - Look for Multi-Use Tools
If you’re investing in tools, it’s wise to select ones that can serve multiple purposes across different DIY projects. For example, an adjustable wrench can be used for tightening plumbing connections, assembling furniture, or even working on other parts of your home’s plumbing system. Similarly, a utility knife is a versatile tool that you’ll find uses for in nearly every home project, from cutting caulk to trimming materials. - Consider Tool Kits
Many hardware stores offer plumbing tool kits that include most of the basic tools you’ll need for sink installation. These kits often provide better value than purchasing each tool individually, and they’re designed to cover the essentials of most plumbing jobs. Some kits even come with specialty tools like Teflon tape or pipe cutters, giving you a well-rounded set for tackling various installations. - Brands Known for Quality
It’s always helpful to choose brands that are trusted in the industry. Brands like Stanley, DeWalt, and Rothenberger are known for their reliability and durability. While these tools might come with a slightly higher price tag, they will last longer and perform better than cheaper alternatives. Investing in a good set of tools from a reputable brand ensures that you won’t be replacing them any time soon.
Quality tools are a long-term investment in your DIY capabilities. If you take care of them properly, they can last for years and make every home improvement project—whether it’s installing a new sink or something else—much easier and more enjoyable.
Safety Considerations When Using DIY Plumbing Tools
Working with plumbing tools involves more than just following instructions—you also need to prioritize safety. Even simple tools like wrenches and screwdrivers can cause injury if not used correctly, and working under the sink in a cramped space presents its own set of challenges. Here’s how to stay safe during your DIY sink installation:
- Wear Protective Gear
Before you start, make sure you have the proper safety equipment. Gloves can protect your hands from cuts or scrapes when handling pipes or sharp tools, while safety goggles are essential to shield your eyes from flying debris, especially when using a jigsaw or pipe cutter. If you’re working in a tight space under the sink, consider using knee pads to protect your joints and make kneeling for extended periods more comfortable. - Know How to Use Your Tools
Take the time to familiarize yourself with each tool before using it. Read the user manuals if available, and make sure you understand how to operate any specialized tools like pipe cutters or jigsaws. Using a tool incorrectly can lead to damage—both to the tool and to yourself. For example, trying to over-tighten a pipe fitting with an adjustable wrench can strip the threads, or mishandling a jigsaw could result in an uneven countertop cut or worse, personal injury. - Be Aware of Water and Electricity
One of the biggest safety risks in kitchen sink installation is the combination of water and electricity. Before starting, ensure that the water supply is completely turned off to avoid accidental flooding. If your sink is near electrical outlets, make sure those circuits are shut off to avoid any chance of electrocution in case water spills. Also, be mindful of nearby electrical wiring while cutting through countertops or walls. - Proper Tool Storage and Handling
Tools like knives and wrenches can be hazardous if left lying around. When you’re not using a tool, place it back in your toolbox or in a safe spot out of the way. Always keep sharp tools like utility knives closed when not in use, and ensure all power tools are unplugged or powered off when not actively being used. Keeping your workspace tidy and organized helps reduce the chance of accidents. - Use Proper Lifting Techniques
Some sinks, particularly cast iron or farmhouse models, can be very heavy. If you need to lift a heavy sink into place, make sure to lift with your legs rather than your back to avoid injury. If the sink is too heavy to handle on your own, don’t hesitate to ask for help. It’s much better to take an extra hand than to risk dropping the sink and damaging both the fixture and yourself.
Prioritizing safety not only protects you from injury but also helps ensure that your sink installation goes smoothly. Proper planning, protective gear, and mindful use of tools will go a long way in making your DIY project both safe and successful.
Common DIY Sink Installation Mistakes and How the Right Tools Help
Even with the right tools at your disposal, it’s easy to make mistakes during a DIY kitchen sink installation, especially if it’s your first time tackling such a project. Fortunately, the correct tools can help you avoid these common pitfalls and ensure that your installation is done right the first time.
- Over-Tightening Connections
One of the most frequent mistakes is over-tightening plumbing connections. When you tighten too much, you can damage the threads on fittings, causing leaks or even breaking the parts. This is where a basin wrench comes in handy. Its design allows for precise tightening in tight spaces, ensuring you get the connection just right without going overboard. - Improper Sealing
Another common mistake is not properly sealing the sink to the countertop. Using poor-quality sealant or failing to apply enough can lead to leaks that cause water damage over time. A good-quality silicone sealant and a proper sealant gun are crucial here. Ensure you apply an even, generous bead of silicone around the edges of the sink to create a watertight seal. The right sealant and tool make the difference between a secure installation and one that leads to water seeping under the sink. - Failing to Use a Level
Many DIYers forget to check if the sink is level before securing it in place, which can lead to improper drainage or an uneven appearance. Even a slight tilt can cause water to pool on one side of the sink. A small, handheld level ensures that your sink sits flush with the countertop, giving it the proper alignment needed for both functionality and aesthetic appeal. - Using the Wrong Type of Putty or Tape
Using the wrong type of plumber’s putty or forgetting to apply Teflon tape to threaded connections is another common error. Putty creates a seal around the drain, while Teflon tape ensures that threaded connections don’t leak. If you skip these steps or use the wrong materials, you’ll likely end up with leaks that are difficult to fix after the fact. - Rushing Through the Process
It’s easy to want to rush through an installation, especially if you’re eager to see the final result. However, skipping steps or rushing through them can lead to costly mistakes. Tools like a tape measure help ensure you take accurate measurements, while a utility knife allows you to make clean, precise cuts when removing old sealant or making adjustments. Patience and precision are key to a successful installation.
By using the correct tools and taking your time, you can avoid these common mistakes and complete your sink installation with confidence. The right tools not only make the job easier but also ensure that the installation is done correctly, preventing future headaches.
FAQs
1. Can I install a kitchen sink without specialized tools?
While it’s possible to install a kitchen sink without every specialized tool, using the proper ones ensures a faster and more efficient installation. Without tools like a basin wrench or silicone sealant, you may struggle to achieve a professional-quality result.
2. What’s the most important tool for DIY sink installation?
If we had to pick just one, the basin wrench is a must-have for any sink installation. It allows you to reach and tighten nuts in the hard-to-reach areas under the sink that would be nearly impossible to access with a regular wrench.
3. Can I rent sink installation tools instead of buying them?
Yes, many hardware stores offer tool rentals, which can be a great option if you only need the tools for one project. However, if you plan on doing more DIY projects in the future, investing in your own set of tools can be more cost-effective in the long run.
4. Do I need a jigsaw for all sink installations?
Not necessarily. A jigsaw is only required if you need to adjust the sink cutout in your countertop. If the sink fits the existing cutout, a jigsaw isn’t needed.
5. How much should I budget for DIY sink installation tools?
You should expect to spend anywhere from $50 to $150, depending on the quality and number of tools you purchase. Basic tools like a wrench, plumber’s putty, and silicone sealant are relatively inexpensive, but specialty tools like a jigsaw or pipe cutter may increase the overall cost.
Conclusion
In any DIY kitchen sink installation, having the right tools on hand is critical for ensuring a smooth, hassle-free process. From basic tools like an adjustable wrench and basin wrench to specialized tools like a jigsaw and pipe cutter, each item plays a crucial role in making sure your sink is installed correctly.
Remember, investing in high-quality tools not only ensures a more professional result but also prepares you for future projects. And by prioritizing safety, taking your time, and following the correct steps, you’ll be well on your way to a successful kitchen sink installation.
Got everything you need for your DIY sink installation? If you’re ready to get started, check out our step-by-step guide to completing the project with ease!