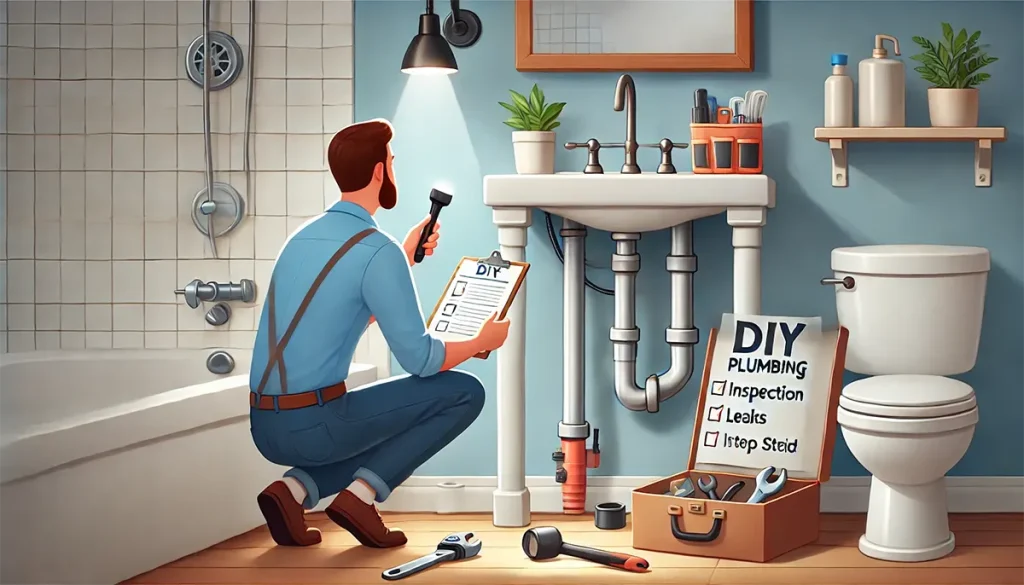
Why DIY Plumbing Inspections are Important
You might not realize it, but your plumbing system is like the veins of your home, quietly doing its job behind the scenes—until something goes wrong. DIY plumbing inspections can save you a lot of headaches down the road by catching small issues before they become big, expensive problems. It’s like going to the doctor for a regular checkup—just for your house. Plus, let’s be real, nobody wants to deal with a plumbing emergency. And let me tell you, I’ve been there, standing knee-deep in water because I missed a leaky pipe. Not fun!
Beyond saving you money, doing your own inspections gives you peace of mind, especially if you’re thinking about selling your house or buying a new one. A simple DIY checkup can give you a heads-up about potential problems and help you avoid nasty surprises during a professional home inspection. And hey, it’s always nice to know how your home’s plumbing system works, right?
Tools You’ll Need for a DIY Plumbing Inspection
Before you jump into inspecting your plumbing, you need to have the right tools. Think of this as your plumbing toolkit—having the right gear can make all the difference.
- Flashlight: You’ll need a good flashlight to peer into dark corners, under sinks, and in crawl spaces. Trust me, you don’t want to miss that slow drip under your kitchen sink just because it was hiding in the shadows.
- Adjustable Wrench: This is a must-have for testing out fixtures and tightening loose connections. You’ll feel pretty handy when you’re adjusting valves or fixing a leaky faucet on your own.
- Leak Detection Tool: If you really want to level up, a leak detection tool is a great investment. It helps you find those sneaky leaks you might not be able to see with the naked eye. I bought one after a massive water bill and, man, it was a game-changer.
- Video Inspection Camera (optional but recommended): If you’re feeling like a pro, a small camera system will let you inspect drains and pipes in hard-to-reach areas. It’s not essential, but it’s super useful, especially for deep inspections.
- Bucket and Gloves: Keep a bucket handy for any water that might escape during your inspection and gloves to keep things clean. Trust me, this is one of those “learn from my mistake” tips.
How to Inspect Your Plumbing System Room-by-Room
This is where the fun begins. You’ll want to break it down room by room, checking for signs of wear, leaks, or blockages. Here’s a simple step-by-step for each key area:
Kitchen:
- Start under the sink. This is one of the most common places for leaks, mold, and damp spots. Use your flashlight to inspect around pipes and the base of the sink.
- Check the faucet. Is it dripping or does it have low water pressure? If so, you might need to clean the aerator or tighten some connections.
- Don’t forget the garbage disposal! Test it to ensure it’s working smoothly and not leaking underneath.
Bathroom:
- Inspect the toilet for leaks around the base. If you see water pooling or notice any discoloration, it’s a sign something’s off.
- Turn on the shower and sink faucets. Look for any dripping or low water pressure, which could be caused by mineral buildup or faulty pipes.
- Check the floor for soft spots. This is key, especially around the tub and toilet where water damage can lurk.
Laundry Room:
- Take a close look at the hoses on your washing machine. If they’re cracked or worn, it’s time for replacements (and trust me, you don’t want to wait for them to burst).
- Inspect the drain and vent for clogs. This can prevent backups and keep your laundry room smelling fresh.
Basement/Crawl Space:
- Check for standing water or moisture, which can be signs of a leak. I once missed a slow leak here and ended up with mold—lesson learned!
- Inspect any exposed pipes for rust or corrosion.
- Don’t forget to check the water heater. Look for rust around the base or any pooling water.
Signs of Plumbing Issues to Watch For
Even if everything looks good on the surface, there are some telltale signs that you might have a plumbing issue brewing. Keep an eye (and ear) out for these:
- Low Water Pressure: If your faucets or showerheads seem to have less pressure than usual, there could be a clog or leak somewhere in the system.
- Slow-Draining Sinks or Tubs: This is often a sign of a blockage. If you notice water sitting longer than usual before draining, grab a plunger or drain snake.
- Unpleasant Odors: Bad smells coming from your drains might indicate a clog or sewer issue. Trust me, it’s one of those smells you can’t ignore for long!
- Water Stains on Walls, Ceilings, or Floors: Discoloration or bubbling paint is a major red flag for hidden leaks.
- High Water Bills: If your water usage hasn’t changed but your bill has spiked, there’s likely a leak somewhere.
What to Do if You Find a Problem
Finding an issue during your DIY plumbing inspection isn’t the end of the world. Most minor problems are easy to fix:
- Small Leaks: Tighten any loose connections with your wrench or wrap some plumber’s tape around the threads.
- Clogged Drains: A plunger is your best friend here. For more stubborn clogs, you can use a drain snake to clear out any buildup.
- Faulty Valves: If you’ve got a valve that’s leaking or not working properly, it might be time to replace it. It’s a quick and easy fix that can prevent bigger issues down the line.
For bigger problems—like sewer line backups or major leaks—don’t hesitate to call in a pro. Some things are just beyond a DIY fix, and that’s okay!
How Often Should You Perform a DIY Plumbing Inspection?
Here’s the rule of thumb: inspect your plumbing at least twice a year. Once in the spring, after the winter chill, and once in the fall to prepare for any cold snaps. If you’ve recently had major renovations or severe weather, it’s a good idea to do an extra checkup. Regular inspections help you catch problems early and avoid costly repairs in the future.
FAQs
-
What’s the most common issue found during a DIY plumbing inspection?
Dripping faucets and slow-draining sinks are some of the most common issues homeowners find.
-
Is it safe to inspect my own plumbing system?
Yes, for minor checks. However, always call a professional for complicated or large-scale problems.
-
What’s the cost of a professional plumbing inspection?
On average, a professional plumbing inspection can cost anywhere from $150 to $500, depending on the home size and complexity.
-
Can I use a DIY plumbing inspection kit?
Absolutely! These kits come with essential tools to help you spot potential plumbing problems.