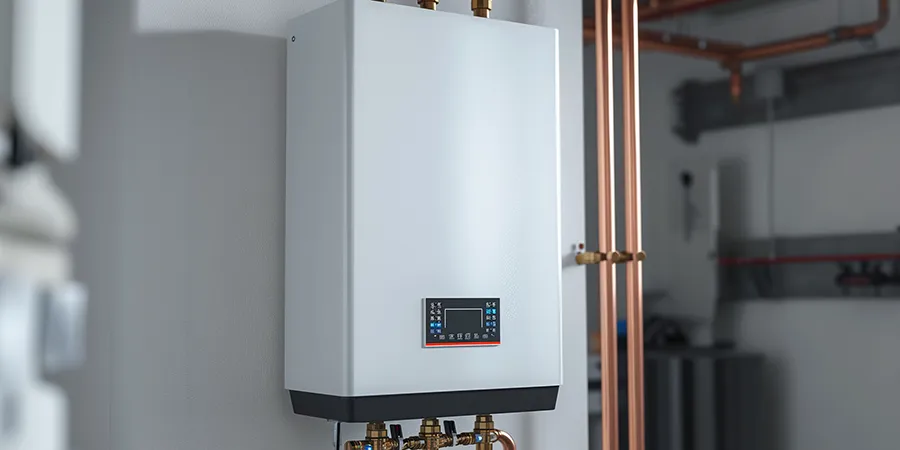
A tankless water heater rewards steady upkeep. Because it fires only when you open a hot tap, mineral scale collects on the heat exchanger over time — and left alone, that scale is what quietly steals efficiency, throttles flow, and shortens the unit’s life. This guide walks through the annual flush and descale, the smaller checks that keep the system healthy between services, the warning signs worth acting on, and when the job belongs with a licensed pro.
The efficiency payoff is real. According to the U.S. Department of Energy, a demand-type unit is roughly 24–34% more energy efficient than a conventional storage tank in homes that use about 41 gallons of hot water a day or less — and still 8–14% more efficient in high-use homes (around 86 gallons a day). If you’re still weighing the switch, our water heater basics guide compares all four types. Either way, holding on to that efficiency edge is what upkeep is for.
How a Tankless Water Heater Works
Unlike traditional storage tanks that keep a large volume of water hot around the clock, a tankless model heats water on demand as it flows through the unit. When you open a hot tap, cold water travels through a pipe into the heater, where a gas burner or an electric element brings it up to temperature and delivers a continuous supply. Eliminating that standing tank is what removes standby losses — but it also means the heat exchanger sees every mineral the incoming water carries, which is exactly why regular servicing matters.
Why Regular Upkeep Matters
Servicing a tankless heater is about protecting your investment, holding on to its efficiency, and pushing its lifespan toward the high end of the range. The DOE puts tankless life expectancy at more than 20 years — well beyond the 10–15 years typical of a tank — but only a maintained unit gets there. Neglect invites a familiar set of problems:
- Reduced efficiency and higher energy bills
- Inconsistent water temperatures
- Reduced hot-water flow
- Premature failure of internal components
- A shorter overall lifespan
A simple yearly routine heads off nearly all of it.
The descale & flush kit
Gather these before you start — most plumbing suppliers sell them together as a tankless flush kit, or you can assemble your own:
- Submersible pump — a small (about 1/6 HP) utility pump to circulate the solution through the unit.
- Two washing-machine hoses — one supply line from the pump to the cold service port, one return line from the hot service port back to the bucket.
- A 5-gallon bucket — holds the solution and catches the return.
- About 3–4 gallons of undiluted white vinegar — or the manufacturer’s own descaling solution. Skip harsh chemical cleaners.
- The unit’s service isolation valves — the hot and cold shutoffs with purge ports installed at the heater. If yours weren’t fitted at install, add them; they make this a 45-minute job instead of a plumbing project.
Routine Maintenance Tasks
Flushing and Descaling the System
The single most important task is the annual flush, which dissolves the mineral scale that builds up inside the heat exchanger — more urgent in hard-water areas. Work through the steps below once a year with the unit powered down and cool. Manufacturers such as Rinnai publish the same procedure for their units:
- Cut the power. Switch off the unit’s breaker (electric) or turn the gas control to “off” and close the gas shutoff (gas). Let the unit cool.
- Close the isolation valves. Turn the hot and cold service valves to the closed position so the heater is sealed off from your plumbing.
- Open the purge ports. Open the purge-port valves (usually a quarter-turn perpendicular to the main valves) and remove their caps.
- Connect the hoses and pump. Run a hose from the submersible pump’s outlet to the cold purge port (the supply line), and a second hose from the hot purge port into the 5-gallon bucket (the return line). Set the pump in the bucket.
- Add the solution. Pour about 3–4 gallons of undiluted white vinegar (or manufacturer descaler) into the bucket, enough to submerge the pump.
- Circulate for 45–60 minutes. Switch on the pump and let the solution loop through the heat exchanger to dissolve the scale.
- Drain and rinse. Turn off the pump, dispose of the used solution, then briefly reopen the cold isolation valve for about 5–10 minutes to flush fresh water through and carry off any remaining vinegar and debris.
- Reassemble. Close the purge ports and reinstall their caps, remove the hoses, reopen both isolation valves, then restore power or gas and confirm normal operation.
Done annually, this one task does more for efficiency and longevity than anything else on the list.
Cleaning the Inlet Filter
Most tankless units have a small inlet filter that keeps debris out of the system. Clean it every few months to protect flow:
- Locate the water inlet filter, usually near the cold-water inlet connection.
- Remove it carefully, following the manufacturer’s instructions.
- Rinse it under running water to clear accumulated debris.
- For stubborn buildup, work it gently with a soft brush.
- Reseat the filter in its housing.
A clean filter keeps water flow steady and spares the internal components downstream.
Inspecting the Components
A quick visual once-over each season catches small problems early. Look for:
- Loose or weeping connections: check all water and gas fittings for leaks or play.
- Corrosion: inspect visible parts for rust that could signal a developing fault.
- Unusual noises: listen for popping or crackling while the unit runs, a common sign of scaling.
- Venting (gas units): make sure the vent path is clear of obstructions and properly sealed.
Checking the Pressure-Relief Valve
The pressure-relief valve is a critical safety device. Test it as part of the yearly routine:
- Locate the valve, usually on the side of the unit.
- Place a bucket under the discharge pipe.
- Lift the lever briefly to release a small amount of water, then let it snap closed.
- If no water flows or the valve won’t reseat, replace it — never cap or bypass it.
Ballpark cost: DIY vs. professional
A pro descale runs more than doing it yourself, but a DIY kit pays for itself after the first flush or two — and the vinegar is pocket change. Costs swing with region, water hardness, and whether service valves are already fitted, so treat these as ballpark ranges, not quotes.
Professional flush / descale ~$150–400 · DIY flush kit (pump + hoses + bucket) ~$130–250 · White vinegar per flush ~$10–20 · Ranges vary by market and water hardness
Shut it down safely before you service it
Before touching the unit, kill the energy source first: switch off the breaker on an electric model, or turn the gas control to “off” and close the gas shutoff on a gas model — working on a live gas unit risks a leak or a carbon-monoxide hazard. Set the thermostat to 120°F; the DOE recommends it as the balance point between comfort, efficiency, and scald safety, since water at 140°F can cause a serious burn in seconds while 120°F gives far more reaction time. Keep the area ventilated while circulating vinegar or descaler, and never cap, plug, or bypass the pressure-relief valve — it’s the device that vents dangerous pressure, and a working one prevents a catastrophic failure. Leave gas connections, venting, and electrical hookups to a licensed pro.
Signs Your Unit Needs Attention
A yearly routine prevents most trouble, but watch for these between services:
- Fluctuating temperatures: sudden swings can point to scale buildup or a failing heating element.
- Reduced flow: a drop in hot-water volume often means mineral buildup or a clogged filter.
- Error codes: most units display diagnostic codes — check your owner’s manual to read them.
- Odd smells or discolored water: can indicate internal corrosion or a supply problem.
- Unusual noises: popping or crackling during operation usually signals scaling.
Any of these is a cue to run the flush routine or call a professional.
Getting the Most Efficiency
Upkeep and efficiency go hand in hand. A few habits stretch every therm and kilowatt further:
- Set the temperature to 120°F for the best balance of comfort, efficiency, and scald safety.
- Install low-flow fixtures: efficient showerheads and aerators trim hot-water demand.
- Insulate hot-water pipes to cut heat loss on the run from the unit to the tap.
- Wash laundry in cold water where you can to ease demand.
- Stick to the yearly flush — a scale-free heat exchanger is an efficient one.
When to Bring in a Professional
Plenty of this is homeowner-friendly, but some tasks belong with a licensed technician — especially if you’re not comfortable around gas or electrical components. Consider an annual professional service, during which a technician can:
- Perform a thorough inspection of all components
- Check and adjust gas pressure on gas units
- Inspect and clean the burner assembly
- Test safety controls and electrical components
- Run a more comprehensive descale of the heat exchanger
A professional visit catches issues early and confirms the system is running at its best.
FAQs
Q: How often should I flush my tankless water heater?
A: Once a year is the general rule in areas with moderate water hardness. In hard-water homes, every 6–9 months is safer; very soft water can stretch to every 18–24 months.
Q: Can I do the work myself?
A: Filter cleaning, visual inspections, and the vinegar flush are reasonable DIY jobs if service valves are fitted. Anything involving gas or electrical connections should go to a professional.
Q: Will upkeep really extend the unit’s life?
A: Yes. Keeping the heat exchanger free of scale is the main thing that lets a tankless unit reach the top of its range.
Q: How long does a tankless water heater typically last?
A: With regular servicing, the DOE puts tankless life expectancy at 20 years or more — compared with about 10–15 years for a traditional tank.
Q: Anything special about gas units?
A: Gas models need extra attention to venting and gas connections, so it’s often best to have a professional handle their service.
Q: How do I know if my water is hard?
A: Scale on fixtures, spots on dishes, and weak soap lather are all signs. A home test kit or a call to your water utility will confirm it.
Conclusion
Keeping a tankless water heater healthy comes down to a short yearly routine: flush the heat exchanger, clean the inlet filter, eyeball the connections, and test the relief valve — all with the power or gas off first. Set it to 120°F, keep the relief valve working, and stay on top of the annual descale, and your on-demand system should deliver efficient hot water for two decades or more. When a job crosses into gas, venting, or electrical, bring in a licensed plumber.
Sources & verification
- Demand-type water heaters are 24–34% more energy efficient than storage tanks in homes using ~41 gallons/day or less, and 8–14% more efficient in high-use (~86 gallons/day) homes — U.S. DOE Energy Saver, Tankless or Demand-Type Water Heaters.
- Tankless units have a life expectancy of 20+ years (vs. ~10–15 for storage tanks) and deliver about 2–5 gallons per minute — U.S. DOE Energy Saver, Tankless or Demand-Type Water Heaters.
- The DOE recommends setting the water-heater thermostat to 120°F for energy savings and scald prevention — U.S. DOE Energy Saver, Water Heating.
- Annual descale procedure — close the isolation valves, shut off gas/power, circulate about 4 gallons of undiluted white vinegar with a pump for roughly 45–60 minutes, then rinse with fresh water — Rinnai, How to Flush/Clean My Tankless Water Heater.
- Scale from calcium and magnesium coats the heat exchanger and insulates it, so descaling is needed annually (every 6–9 months in hard water) — Navien, Tankless Water Heater Maintenance Tips.
- Tankless (demand) water heaters avoid standby losses and provide continuous on-demand hot water — ENERGY STAR, Whole-Home Tankless Gas Water Heaters: Benefits & Savings.
Last verified: Jul 2026