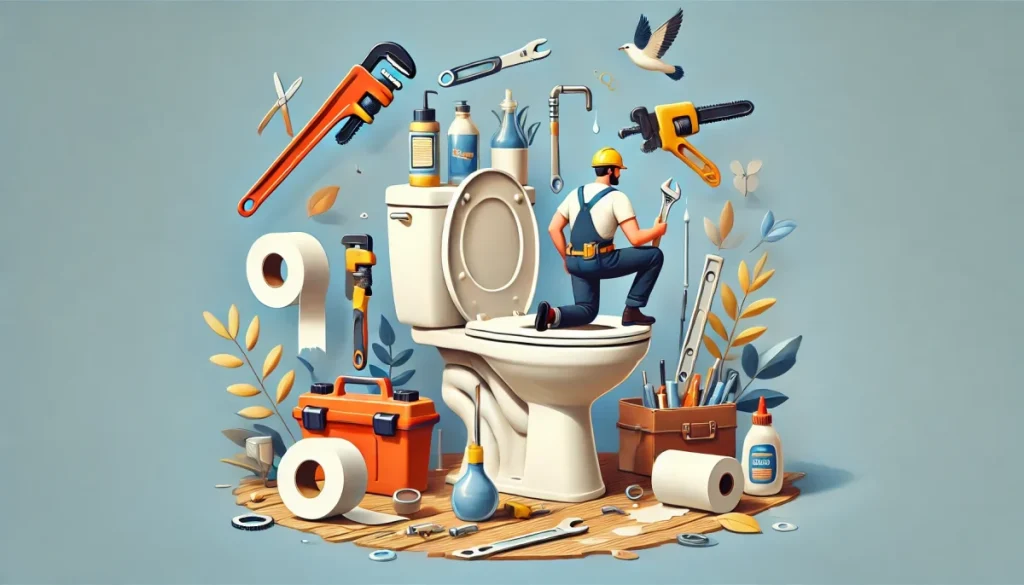
Introduction to DIY Toilet Repairs
Toilets are by far the main source of water use in the home, accounting for nearly 30 percent of an average home’s indoor water consumption. When it comes to home repairs, toilet issues can feel like the ultimate annoyance. But here’s the good news: with a little bit of guidance, even if you’re not exactly Mr. or Ms. Fix-It, you can handle most common toilet repairs yourself! No need to call the plumber for every little problem—that’ll save you both time and money.
Why bother with DIY toilet repairs, though? Well, for starters, it’s empowering. There’s something about being able to fix your toilet and not having to wait hours (or days) for someone else to do it. Plus, most toilet repairs are pretty straightforward and only take a few minutes once you know what you’re doing.
Common Toilet Problems Homeowners Face
The average toilet has a few common problems that come up again and again. You’ve probably dealt with some of these already:
- Running Toilet: That annoying sound of water constantly flowing? Yeah, that’s money going down the drain.
- Clogs: Ever had a toilet back up right before guests arrive? Super fun. Not.
- Leaky Toilet Base: Water pooling at the base of your toilet? Major yikes. A leak left unchecked can damage your flooring.
The Benefits of Repairing Your Own Toilet
Taking the DIY approach comes with some solid perks. For one, it’s cheaper! Most repairs require a few basic tools and inexpensive parts. A plumber’s hourly rate can easily run you $100 or more, and a simple fix often costs you next to nothing if you do it yourself.
Then there’s the pride. Once you get the hang of fixing your toilet, it’s like this badge of honor. It might sound small, but being able to solve household issues without outside help makes you feel unstoppable!
Essential Tools You’ll Need for DIY Toilet Repairs
Alright, so before diving into the nuts and bolts (literally) of toilet repairs, you’ve got to have the right tools. The good news? You don’t need an entire hardware store in your garage to get started—just a few basics will do for most fixes.
Basic Tools for DIY Toilet Repairs
- Plunger: Your trusty sidekick for any clog situation. If you don’t already own one, now’s the time to invest in a good plunger—preferably one with a flange. The flange design helps create a seal, which is especially useful for toilets.
- Adjustable Wrench: When it comes to tightening bolts or loosening nuts (especially around the toilet base or for parts inside the tank), this is your go-to tool. It’s super versatile, and chances are you’ve already got one lying around.
- Screwdriver: Pretty basic, but often overlooked. You’ll need both flathead and Phillips-head screwdrivers for various parts of your toilet, like the tank bolts or the flush handle.
- Bucket & Sponge: Things can get a little messy when working on a toilet. Before you start any repair, always shut off the water and have a bucket ready to catch any excess water. A sponge or towel will help mop up the remaining water in the tank or bowl.
- Plumber’s Tape (Teflon Tape): This is essential for creating watertight seals, especially when you’re working on pipes or replacing valves. It’s like the duct tape of plumbing—it just works.
Specialized Tools for Advanced Repairs
- Toilet Auger: If a plunger doesn’t quite do the job, a toilet auger (also called a plumbing snake) can help break up stubborn clogs. It’s more advanced than a plunger, but once you’ve used it a few times, you’ll feel like a pro. Definitely worth having in your DIY arsenal.
- Replacement Parts: For some repairs, you’ll need specific parts like a fill valve, flapper, or flush handle. These aren’t tools per se, but having them on hand can save you a trip to the store when something suddenly breaks.
- Wax Ring Kit: If you’re dealing with a leaking toilet base, you’ll likely need to replace the wax ring. It’s an easy repair, but you’ll need a wax ring kit, which usually includes a new set of bolts too. Just don’t forget to get the right size for your toilet!
Safety Tips Before Starting Repairs
Before you dive into any repairs, make sure you’ve shut off the water supply to the toilet. There’s usually a valve right behind the toilet—turn it clockwise until it stops. Flush the toilet to drain the water from the tank and bowl (you might still have a little water left in there, which is where your sponge comes in handy).
And one last thing: if you’re ever dealing with a broken porcelain part, be extra careful. Porcelain is sharp when broken, and it’s easy to cut yourself if you’re not cautious. Gloves are your friend here.
How to Fix a Running Toilet
Ah, the infamous running toilet. If you’ve ever lain awake at night, hearing the sound of water trickling away for hours, you know how annoying it can be—not to mention how much it can jack up your water bill. But here’s the good news: fixing a running toilet is usually one of the easiest DIY plumbing jobs out there.
Let’s walk through the steps to get your toilet back in shape.
Step 1: Shut Off the Water Supply
Before you get started, always turn off the water to the toilet. The shutoff valve is located on the pipe coming out of the wall behind your toilet. Give it a firm turn clockwise to stop the water from flowing.
Once the water is off, flush the toilet to empty the tank. There will still be a little water left in the bottom of the tank, but no worries—that’s normal.
Step 2: Check the Toilet Flapper
The flapper is the rubber seal at the bottom of your toilet’s tank that controls water flow from the tank into the bowl. When it’s working correctly, it lifts up when you flush and closes tightly afterward. If it doesn’t close properly, water will keep running.
- Look for signs of wear: Flappers tend to wear out over time. If it’s looking warped, cracked, or just generally worse for wear, it’s probably time for a replacement.
- Make sure it’s aligned: Sometimes the flapper just gets misaligned. Make sure it’s sitting flat on the opening and isn’t being blocked by anything.
- Check the chain: If the chain attached to the flapper is too short, it might be lifting the flapper up slightly, causing water to leak through. If it’s too long, it can get tangled, which also stops the flapper from closing properly. Adjust the length so that it has just enough slack.
Replacing a flapper is a cheap and easy fix. You can pick up a new one at any hardware store for just a few bucks. Simply unclip the old one and clip the new one in its place.
Step 3: Adjust or Replace the Fill Valve
If the flapper isn’t the issue, the fill valve could be to blame. The fill valve controls the water level in your tank. If the water level is set too high, it will spill into the overflow tube, causing the toilet to run constantly.
- Check the water level: Look for the water level mark inside your toilet tank (it’s usually an indicator on the overflow tube). The water should be about an inch below the top of the tube. If it’s too high, adjust the fill valve by turning the adjustment screw or sliding the float down.
- Replace the fill valve if needed: If adjusting the float doesn’t fix the problem, it might be time to replace the fill valve altogether. It’s a little more involved, but still doable for most DIYers. You’ll need to remove the old valve and install the new one according to the instructions that come with the replacement part.
Step 4: Common Mistakes to Avoid
- Overtightening connections: When replacing parts, it’s easy to get carried away tightening bolts and screws. Remember, everything doesn’t need to be super tight. Over-tightening can crack the porcelain tank or strip the threads on parts.
- Forgetting to turn the water back on: Yes, it happens! After making repairs, don’t forget to slowly turn the water back on and check for leaks.
- Not testing the flush: After you’ve made adjustments, flush the toilet a few times to make sure the problem is solved. Listen for any signs that water is still running.
Bonus Tip: Test for a Silent Leak
If you suspect a slow leak but don’t see or hear anything, try this simple test: add a few drops of food coloring to the water in the tank. Wait about 15 minutes without flushing. If the colored water shows up in the bowl, you’ve got a silent leak, likely due to a faulty flapper or fill valve.
Unclogging a Toilet: The Simple Approach
We’ve all been there—staring down a clogged toilet and feeling that little bit of panic. It’s one of those moments that no one enjoys, but trust me, unclogging a toilet isn’t as bad as it seems. With the right approach (and a little patience), you can handle most clogs without breaking a sweat. Let’s walk through the steps.
Step-by-Step Instructions for Unclogging Using a Plunger
The trusty plunger is your first line of defense. If you don’t have one, now is the time to get one with a flange. This is the plunger with the little extension at the bottom, which helps form a better seal in the toilet bowl.
- Add Water to the Bowl if Needed: If the toilet bowl is low on water (sometimes the clog leaves it mostly dry), you’ll want to add a little bit of water before you start plunging. Just a few inches—enough to cover the rubber part of the plunger—should do the trick.
- Position the Plunger: Place the plunger over the toilet drain hole and make sure it covers it completely. You want to form a good seal, so press down gently at first to ensure there are no air pockets between the plunger and the bowl.
- Start Plunging: Now it’s time for action! Push down firmly, then pull back up without breaking the seal. Do this a few times, starting slowly, and then increasing pressure as you go. After about 10–15 plunges, you should see the water level drop (the sign that the clog is moving). Once it’s clear, give the toilet a flush to make sure everything’s flowing properly.
- Repeat if Necessary: Sometimes it takes a couple of rounds. If the clog doesn’t clear after the first try, don’t get discouraged. Reposition the plunger and try again. Most clogs will break up after persistent plunging.
When to Use a Toilet Auger Instead of a Plunger
If the plunger isn’t doing the trick, it might be time to level up with a toilet auger (also known as a plumbing snake). This tool is specifically designed to reach deeper into the toilet’s drain, beyond what a plunger can handle.
- Insert the Auger into the Drain: Carefully guide the auger’s end into the toilet drain, cranking the handle as you go. The auger will extend into the pipe, breaking up the clog or snagging onto whatever’s blocking the way.
- Crank and Retrieve: Once you feel resistance (the clog), keep cranking the auger handle to either push the blockage through or pull it back toward the toilet bowl. Be careful here—if it’s something like a small toy or object, you don’t want to force it further into the pipes.
- Flush to Test: After using the auger, flush the toilet to make sure everything’s clear. If the water drains smoothly, you’re in the clear. If not, you may need to repeat the process.
DIY Solutions for Unclogging Without Special Tools
Don’t have a plunger or an auger handy? Don’t worry, you’ve still got options. Here are a few household solutions you can try:
- Hot Water and Dish Soap: Pour about half a cup of dish soap into the toilet bowl, followed by a gallon of hot (not boiling) water. Let it sit for 10–15 minutes. The soap helps break up the clog, and the hot water should loosen things up. Give it a flush after, and the clog should (hopefully) clear.
- Baking Soda and Vinegar: You know how baking soda and vinegar are like the magic combo for cleaning? Well, they can help with clogs too! Pour about a cup of baking soda into the toilet, followed by a cup of vinegar. Let it fizz for about 10 minutes, then follow up with hot water. After a bit of time, try flushing again.
- Wet/Dry Vacuum: If you’re feeling particularly resourceful (and happen to have a wet/dry vacuum), you can try vacuuming the clog out. First, remove as much water as you can from the bowl, then use the vacuum to suction out the obstruction. It’s not the most glamorous method, but it works in a pinch.
What Not to Do When Unclogging a Toilet
- Don’t use chemical drain cleaners: While it might be tempting to reach for that bottle of liquid drain cleaner, it’s actually a bad idea for toilets. The chemicals can damage your pipes and even the porcelain of the toilet itself.
- Don’t keep flushing if it’s not clearing: If the toilet is clogged, flushing multiple times can lead to an overflow—a messy problem you definitely want to avoid.
- Don’t panic: Worst case scenario, the clog won’t budge. If you’ve tried everything and nothing works, it might be time to call in a professional. But for most common clogs, one of these methods will get things flowing again.
Fixing a Leaking Toilet Base
A leaking toilet base is one of those problems that you can’t ignore for long. Water pooling around the bottom of your toilet can damage your flooring, and the longer it goes unchecked, the worse it gets. The good news? Fixing a leaking toilet base isn’t as difficult as it sounds, and with a few tools, you can knock it out in a couple of hours.
Identifying the Source of the Leak
Before diving into the repair, it’s important to make sure that the leak is actually coming from the base. Sometimes, water can drip from other parts of the toilet, like the tank or the supply line, and pool around the base, making it seem like the base is leaking.
- Check the tank: Run your hand around the bottom of the tank to feel for any drips.
- Check the supply line: Make sure the water supply line is securely connected and isn’t leaking.
- Look for condensation: Sometimes, in humid conditions, the toilet tank can sweat, creating water around the base. This usually happens if the toilet has been flushed recently and the water inside is much colder than the room temperature.
If none of those are the culprit, then the wax ring under the toilet might be your issue.
How to Replace the Toilet Wax Ring
The wax ring is the seal between your toilet and the drain pipe in the floor. If it wears out or becomes damaged, water will start to leak from the base every time you flush. Replacing the wax ring is the best solution, and here’s how to do it.
- Turn off the water and drain the toilet: Start by turning off the water supply to the toilet. Flush the toilet a couple of times to drain as much water as possible from the tank and bowl. Use a sponge or towel to soak up any remaining water.
- Remove the toilet: Unscrew the nuts that secure the toilet to the floor using an adjustable wrench. Carefully lift the toilet straight up off the floor. If it’s been a while since it was installed, the toilet might be stuck, so you may need to wiggle it a bit to break the seal.
- Scrape off the old wax ring: Once the toilet is removed, you’ll see the old wax ring around the drain on the floor. Use a putty knife to scrape off all the old wax. Make sure the surface is clean and dry before installing the new ring.
- Install the new wax ring: Position the new wax ring on the toilet flange (the pipe opening in the floor). Some people prefer to place the ring on the bottom of the toilet instead. Either way works, but the key is to make sure the ring is centered and ready for the toilet to be lowered onto it.
- Reinstall the toilet: Carefully lower the toilet straight down onto the wax ring. Don’t twist or move it around too much—this can break the seal. Press down firmly to ensure the toilet is seated on the ring.
- Tighten the bolts: Reattach the nuts and bolts that secure the toilet to the floor. Be careful not to overtighten them—this can crack the porcelain. Once the toilet is firmly in place, reconnect the water supply.
- Test for leaks: Turn the water back on and flush the toilet. Watch around the base to see if any water is leaking out. If everything is sealed properly, there should be no more leaks.
Tightening the Toilet Bolts Without Damaging the Base
If the wax ring isn’t the issue, loose bolts could be the problem. Over time, the nuts that hold your toilet in place can loosen, causing the toilet to wobble and leak.
- Gently tighten the bolts: Use an adjustable wrench to tighten the nuts at the base of the toilet. Do this carefully—you don’t want to crack the porcelain. Tighten each nut a little at a time, alternating from one side to the other to ensure the toilet stays level.
- Don’t overtighten: It’s tempting to crank down on the bolts to make sure everything’s secure, but resist the urge. Overtightening can cause the base of the toilet to crack, which would lead to an even bigger repair job.
- Check for wobbling: Once you’ve tightened the bolts, give the toilet a gentle push from side to side to see if it still wobbles. If it’s stable and not leaking, you’re good to go.
When to Call a Professional
If you’ve replaced the wax ring and tightened the bolts but the toilet is still leaking, it could be a sign of a larger issue, like a damaged flange or pipe. In that case, it’s best to call a plumber to avoid causing further damage.
How to Replace a Toilet Handle
A toilet handle might not seem like a big deal, but when it’s loose, sticking, or just not working, it can be a huge inconvenience. Fortunately, replacing a toilet handle is a quick and easy fix—one that you can tackle in less than 30 minutes with just a few tools. Here’s how to get your toilet back to proper working order.
Reasons Why Toilet Handles Wear Out
Toilet handles can wear out for a variety of reasons:
- Frequent use: Over time, the constant pressing and pulling on the handle causes wear and tear.
- Rust and corrosion: If you live in an area with hard water or have an older toilet, the metal parts inside the tank can corrode or rust, making the handle stick or stop working.
- Loose connections: Sometimes the handle becomes loose, and tightening it can be all you need to do. But other times, the internal parts wear out and need to be replaced entirely.
Whether your handle is loose, stuck, or just not triggering the flush anymore, here’s how you can replace it yourself.
Step-by-Step Guide to Replacing the Handle
- Turn off the water: First things first, turn off the water supply to the toilet. You can do this by turning the shutoff valve (located behind the toilet) clockwise. Flush the toilet to drain the water from the tank, so you can access the handle mechanism without getting wet.
- Remove the lid and inspect the handle: Take the lid off the toilet tank and set it aside carefully. Inside, you’ll see that the handle is connected to a lever, which is attached to a chain that lifts the flapper when you flush.
- Disconnect the chain: Unhook the chain from the lever. This chain connects the handle to the flapper and allows the toilet to flush when the handle is pressed. Simply unclip the chain from the lever to free up the handle.
- Unscrew the old handle: Most toilet handles are held in place by a nut on the inside of the tank. Using a wrench or your hand, loosen the nut by turning it counterclockwise (this is actually reverse-threaded, so it may feel a bit awkward). Once the nut is removed, slide the old handle and lever out from the tank.
- Install the new handle: Slide the new handle through the hole where the old one was. Make sure it’s positioned so that the handle points correctly to the front of the toilet. Reattach the nut, tightening it clockwise this time (remember, it’s reverse-threaded). Be careful not to overtighten it—you just need it snug.
- Reconnect the chain: Reattach the chain to the new handle’s lever. Make sure the chain has enough slack so the flapper can close fully after each flush, but not so much that it hangs loosely. A properly adjusted chain will lift the flapper without requiring too much effort on your part.
- Test the handle: Turn the water supply back on and give the handle a test flush. It should lift the flapper and allow water to flush the toilet. If the handle feels stiff or doesn’t trigger the flush properly, check the chain length and ensure everything is connected securely.
Testing and Adjusting the Handle After Installation
After installing your new handle, you might notice that the flush isn’t as smooth as you’d like. Here are a few adjustments you can make:
- Adjust the chain: If the handle feels too loose or doesn’t lift the flapper enough, try shortening the chain by moving it up a few links. If it feels too tight or the flapper isn’t closing properly, try lengthening the chain.
- Check the lever alignment: Make sure the lever attached to the handle is aligned correctly and isn’t rubbing against the side of the tank. If it’s not aligned, the handle will feel stiff or hard to press.
- Look for obstructions: Sometimes the lever can get caught on the other parts inside the tank, like the fill valve. Make sure everything moves freely when you press the handle.
Once everything is adjusted, you should be able to flush smoothly, and the handle will last for years without any issues.
When You Might Need a Professional
In most cases, replacing a toilet handle is a quick and easy DIY project. But if the handle isn’t the issue and the toilet still won’t flush, the problem might be deeper in the plumbing system. If you’ve replaced the handle and the flush is still malfunctioning, you might need to call a plumber to diagnose the issue.
Preventative Maintenance Tips to Keep Your Toilet in Good Shape
Once you’ve tackled those common toilet repairs, the last thing you want is for the same issues to pop up again. Good news—there are some simple preventative maintenance steps you can take to keep your toilet in top condition and avoid future problems. A little attention here and there can save you from dealing with bigger, messier repairs down the line.
Regular Cleaning and Inspection Routines
A clean toilet isn’t just about hygiene—it’s also the first step to preventing long-term issues. Buildup from hard water, mineral deposits, and general gunk can interfere with the toilet’s mechanics.
- Clean your toilet weekly: Use a non-abrasive toilet bowl cleaner to prevent mineral buildup that can clog jets and reduce flushing power. Don’t forget to scrub under the rim, where deposits can form.
- Inspect the tank regularly: Every month or so, take a peek inside the toilet tank. Check for signs of rust, corrosion, or debris that could affect the parts inside. Keep the tank interior clean by flushing it out with a little vinegar and water to dissolve any mineral deposits.
- Keep an eye on the flapper: Over time, the flapper can wear out, warp, or become misaligned. A quick inspection every few months can catch issues before they cause the toilet to run constantly or leak water into the bowl.
Checking Water Levels and Flush Strength
A properly functioning toilet shouldn’t have to be flushed multiple times to clear the bowl. If you’re noticing weak flushing or irregular water levels, it could indicate an issue brewing inside.
- Check the water level in the tank: The water level should be about an inch below the top of the overflow tube. If it’s too low, the toilet won’t flush properly. If it’s too high, water might spill into the overflow tube and cause the toilet to run constantly.
- Test the flush strength: After each cleaning, flush the toilet to make sure it’s working smoothly. If you notice any delays, weak flushes, or incomplete flushing, take the time to investigate. Weak flushes can be caused by clogged jets under the toilet rim or issues with the fill valve.
Addressing Minor Issues Before They Become Major Problems
One of the biggest keys to maintaining a healthy toilet is nipping problems in the bud before they escalate.
- Fix leaks right away: Even a small leak can waste a lot of water over time. If you notice water around the base of the toilet or hear the toilet running after flushing, don’t ignore it. Whether it’s a leaky wax ring or a malfunctioning flapper, addressing the problem early will save you from a more expensive repair later.
- Replace worn-out parts promptly: Toilet parts like the flapper, fill valve, and flush handle can wear out over time. Luckily, they’re cheap and easy to replace. Don’t wait until these parts completely break down—if you notice signs of wear, replace them before they cause bigger problems.
Avoiding Clogs with Simple Precautions
Clogs are one of the most common toilet issues, but they’re also one of the easiest to prevent. A few simple habits can save you from dealing with frequent blockages.
- Watch what you flush: The golden rule of toilet use—only flush human waste and toilet paper. Avoid flushing anything else, like wipes, sanitary products, paper towels, or other foreign objects. Even items labeled “flushable” can cause blockages over time.
- Limit toilet paper use: While toilet paper is safe to flush, using large amounts at once can clog the pipes. Teach everyone in your household to be mindful of how much they’re flushing.
- Invest in a quality plunger: Even with the best precautions, clogs can still happen from time to time. Keep a good plunger handy for quick and easy unclogging. A flange plunger is best for toilets, as it creates a tight seal and is more effective.
Upgrading to Water-Saving Features
If you’re looking to take your toilet maintenance game to the next level, consider upgrading to water-saving features that reduce wear and tear on your system.
- Install a dual-flush toilet: Dual-flush toilets offer two flushing options—one for liquid waste and one for solid waste. This reduces water usage overall and puts less strain on your plumbing system.
- Upgrade to a low-flow toilet: If your toilet is older, you might want to consider replacing it with a modern low-flow model. These toilets use significantly less water per flush and are better for the environment.
FAQs
-
How often should I inspect my toilet for potential issues?
It’s a good idea to inspect your toilet every few months. Look for signs of leaks, listen for running water, and check the handle, fill valve, and flapper for any signs of wear. Regular inspections can help you catch small problems before they turn into bigger, more expensive repairs.
-
Is it worth buying specialized toilet repair tools?
For most DIY repairs, basic tools like a plunger, adjustable wrench, and screwdriver will get the job done. However, if you find yourself dealing with frequent clogs or more complicated issues, investing in a toilet auger or replacement parts kit could save you time and money in the long run.
-
What should I do if DIY toilet repairs don’t solve the problem?
If you’ve tried common fixes like replacing the flapper or adjusting the fill valve but the problem persists, it might be time to call a professional plumber. There could be a deeper issue with the plumbing that requires more advanced tools or expertise.
-
How long should a typical toilet repair take for beginners?
Most basic toilet repairs, like replacing a flapper or fixing a leaking handle, can be done in 30 minutes or less. Replacing the wax ring or installing a new fill valve may take a bit longer, around an hour. With the right tools and instructions, even beginners can handle these repairs without too much trouble.
-
When should I call a professional for toilet repairs?
If your toilet is still leaking or not functioning properly after trying DIY solutions, or if the issue seems to be with the pipes rather than the toilet itself, it’s time to call a plumber. They can diagnose more complex issues, like sewer line problems or damaged pipes, which require specialized tools and expertise.
Conclusion
Keeping your toilet in good working condition doesn’t have to be a headache. With a few basic tools, a little DIY know-how, and some regular preventative maintenance, you can tackle most common toilet issues without calling in a pro. Whether it’s a running toilet, a clogged drain, or a leaking base, these fixes are easy to handle and can save you both time and money.
By staying on top of minor repairs and performing regular maintenance, you’ll extend the life of your toilet and prevent small issues from becoming big, expensive problems. Plus, there’s nothing quite as satisfying as knowing you can fix things yourself!
Remember, if a problem feels too big or if you’ve tried everything and the issue still persists, don’t hesitate to call a professional. Sometimes, deeper plumbing issues require expert attention, and there’s no shame in getting help when you need it.