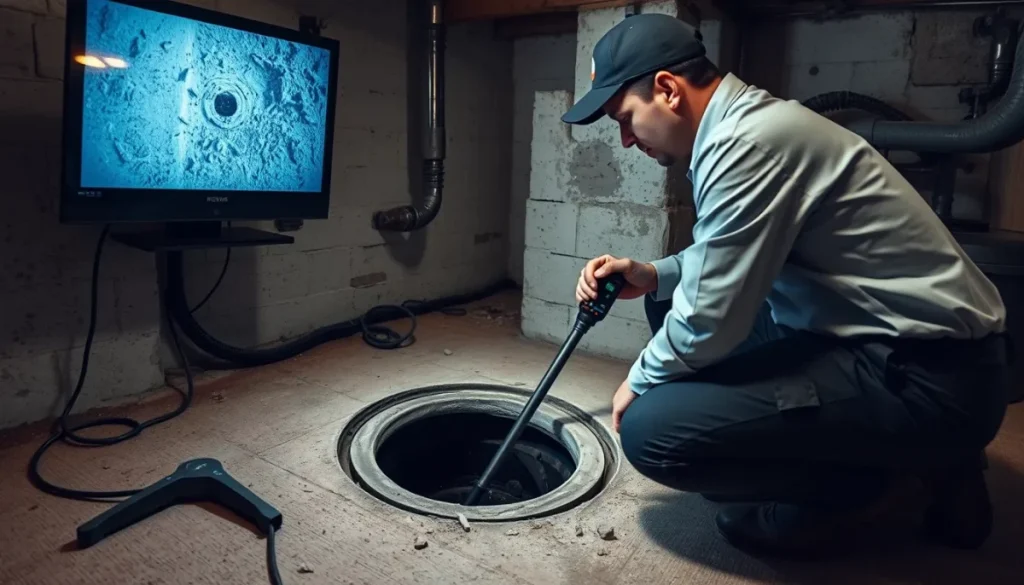
Imagine being able to see through walls and peer into the hidden depths of your home’s plumbing system. That’s precisely what a sewer camera allows you to do. Just as a submarine explores the mysterious underwater world, a sewer camera navigates the intricate network of pipes beneath your feet, revealing secrets that would otherwise remain hidden from view.
In today’s world of DIY home maintenance, having the right tools at your disposal can make all the difference. A sewer camera is one such tool that has revolutionized the way homeowners approach plumbing inspections and maintenance. But with so many options available on the market, how do you choose the right sewer camera for your needs?
This comprehensive guide will walk you through everything you need to know about selecting the perfect sewer camera for DIY inspections. Whether you’re a beginner looking to perform occasional checks or a more experienced homeowner aiming to take your maintenance game to the next level, we’ve got you covered.
The Importance of Sewer Inspections
Before we dive into the specifics of choosing a sewer camera, let’s take a moment to understand why these inspections are so crucial. According to the Environmental Protection Agency (EPA), the average household’s leaks can account for nearly 10,000 gallons of water wasted every year. That’s equivalent to the amount of water needed to wash 270 loads of laundry!
Regular sewer inspections can help identify these leaks and other potential issues before they escalate into major problems. By using a sewer camera, you can:
- Detect blockages early on
- Identify the source of leaks
- Spot cracks or damage in pipes
- Prevent costly repairs down the line
- Ensure the overall health of your plumbing system
Now that we understand the importance of sewer inspections let’s explore how to choose the right sewer camera for your needs.
Key Features to Look for in a Sewer Camera
When selecting a sewer camera for DIY inspections, several key features can make a significant difference in your experience and the quality of your inspections. Let’s break down these essential features:
Resolution
The resolution of your sewer camera is crucial for obtaining clear, detailed images of your pipes. For DIY inspections, aim for a camera with at least 720p HD resolution. Some high-end models offer 1080p or even 4K resolution, which can be beneficial for identifying small cracks or early signs of damage.
Cable Length
The length of the camera cable determines how far you can inspect into your plumbing system. For most residential properties, a 100-foot cable is sufficient. However, if you have a larger property or want to inspect municipal connections, you might consider a longer cable. Keep in mind that longer cables can be more challenging to manage and may require additional support.
Self-Leveling Head
A self-leveling camera head is a game-changer for DIY inspections. This feature ensures that the image stays upright as the camera moves through the pipes, making it much easier to interpret what you’re seeing. Without this feature, the image may rotate as the camera moves, potentially causing disorientation and making it harder to identify issues accurately.
Lighting
Adequate lighting is essential for clear visibility in dark pipes. Look for sewer cameras with adjustable LED lights. The ability to control the brightness can help you achieve the best possible image quality in various pipe conditions.
Durability
Your sewer camera will be exposed to harsh conditions, including water, debris, and potentially corrosive substances. Choose a camera with a sturdy, waterproof construction to ensure it can withstand these challenges. Look for models with high IP (Ingress Protection) ratings, which indicate better protection against water and dust.
Wi-Fi Connectivity
In today’s connected world, having a sewer camera with Wi-Fi capabilities can greatly enhance your inspection experience. This feature allows you to view the camera feed on your smartphone or tablet, making it easier to record and share findings. Some advanced models even offer cloud storage for your inspection videos and images.
Screen Size and Quality
If your sewer camera comes with a dedicated monitor, consider the screen size and quality. A larger screen (7 inches or more) can make it easier to spot details, while a high-quality display ensures better visibility in various lighting conditions.
Battery Life
For cordless models, battery life is an important consideration. Look for cameras that offer at least 3-4 hours of continuous use on a single charge. Some models come with replaceable batteries, which can be handy for longer inspection sessions.
Recording Capabilities
The ability to record your inspections can be invaluable for documenting issues, sharing findings with professionals, or comparing the state of your pipes over time. Check if the camera offers both video and image capture, and consider the storage capacity or compatibility with external storage devices.
Locator Beacon
Some advanced sewer cameras come with a locator beacon feature. This allows you to pinpoint the exact location of the camera head from above ground, which can be extremely useful if you need to excavate or perform repairs at a specific point in your plumbing system.
Benefits of Using a Sewer Camera for DIY Inspections
Now that we’ve covered the key features to look for in a sewer camera, let’s explore the numerous benefits of incorporating this tool into your DIY home maintenance routine:
Early Detection of Issues
One of the primary advantages of using a sewer camera is the ability to identify potential problems before they become major headaches. By regularly inspecting your pipes, you can spot early signs of blockages, leaks, or damage, allowing you to address these issues promptly and potentially avoid costly repairs.
Non-Invasive Inspection Method
Traditional plumbing inspections often involved guesswork or invasive methods like digging up yards or breaking through walls. A sewer camera allows you to inspect your pipes without causing any damage to your property, saving you time, money, and hassle.
Accurate Diagnosis
With a clear view of your pipes’ interior, you can accurately diagnose plumbing issues. This precision helps you avoid unnecessary repairs or treatments based on incorrect assumptions about the problem’s source.
Cost-Effective Maintenance
While the initial investment in a sewer camera might seem significant, it can save you money in the long run. By performing regular DIY inspections, you can catch and address minor issues before they escalate into major, expensive problems.
Peace of Mind
Knowing the exact condition of your plumbing system provides invaluable peace of mind. Regular inspections can help you feel confident that your home’s infrastructure is in good shape, reducing stress and uncertainty about potential plumbing emergencies.
Educational Tool
Using a sewer camera can be an excellent learning experience. As you become more familiar with your plumbing system, you’ll develop a better understanding of how it works and what signs to look out for, empowering you to take better care of your home.
Improved Property Value
If you’re planning to sell your home, having documentation of regular sewer inspections can be a valuable selling point. It demonstrates to potential buyers that the property has been well-maintained and that there are no hidden plumbing issues.
Comparing Different Models and Brands
When it comes to choosing a sewer camera, there’s no one-size-fits-all solution. The best camera for you will depend on your specific needs, budget, and level of expertise. Here are some factors to consider when comparing different models and brands:
Budget Considerations
Sewer cameras come in a wide range of prices, from budget-friendly options under $200 to professional-grade models costing several thousand dollars. For occasional DIY use, you can find quality cameras in the $200-$500 range that offer good performance and durability.
Ease of Use
As a beginner, you’ll want to look for cameras with intuitive controls and user-friendly interfaces. Some models come with color-coded buttons or touchscreen displays that make operation straightforward, even for those with limited technical experience.
Brand Reputation and Customer Support
Choose brands with good reputations for quality and customer service. Look for companies that offer comprehensive warranties and responsive customer support. Reading user reviews and seeking recommendations from DIY forums can provide valuable insights into a brand’s reliability.
Additional Features
Some sewer cameras offer extra features that might be useful depending on your needs. These can include:
- Locator beacons for pinpointing the camera’s position
- Built-in microphones for adding voice notes to inspections
- Adjustable push rod stiffness for navigating tricky pipe bends
- Compatibility with various pipe sizes through interchangeable camera heads
Tips for Using Your Sewer Camera Effectively
Once you’ve chosen your sewer camera, it’s important to use it effectively to get the most out of your investment. Here are some tips for successful DIY sewer inspections:
- Start with a plan: Before inserting the camera, have a clear idea of which areas you want to inspect and why.
- Clean the pipes first: If possible, run water or use a drain snake to clear any obvious debris before the inspection.
- Take it slow: Move the camera slowly through the pipes to ensure you don’t miss any details.
- Use landmarks: Note the distance markings on the cable to help you locate issues precisely.
- Record your findings: Take advantage of recording features to document your inspections for future reference.
- Be gentle: Avoid forcing the camera through tight bends or blockages to prevent damage to both the camera and your pipes.
- Clean the equipment: After each use, clean and disinfect your sewer camera to maintain its performance and hygiene.
- Practice makes perfect: The more you use your sewer camera, the better you’ll become at interpreting what you see.
Frequently Asked Questions
To further assist you in your sewer camera selection and usage, here are answers to some commonly asked questions:
Q: How often should I inspect my sewer lines?
A: For preventive maintenance, an annual inspection is generally recommended. However, if you experience frequent plumbing issues or live in an area with mature trees (whose roots can intrude into pipes), you might want to inspect more frequently.
Q: Can I use a sewer camera to inspect my septic system?
A: Yes, you can use a sewer camera to inspect the pipes leading to and from your septic tank. However, be cautious when inserting the camera into the tank itself, as the harsh environment can potentially damage the equipment.
Q: Do I need special training to use a sewer camera?
A: While professional-grade cameras may require specialized training, many consumer models are designed for easy DIY use. Familiarize yourself with the user manual and practice in easily accessible pipes before attempting more complex inspections.
Q: Can a sewer camera detect all types of plumbing issues?
A: Sewer cameras are excellent for visually identifying blockages, cracks, root intrusions, and other physical damage. However, they may not detect all types of leaks, especially small or intermittent ones. In some cases, additional diagnostic methods may be necessary.
Q: Is it worth buying a sewer camera, or should I hire a professional?
A: If you plan to perform regular inspections and are comfortable with DIY home maintenance, investing in a sewer camera can be cost-effective in the long run. However, for complex issues or if you’re not confident in your ability to interpret the results, it’s always wise to consult a professional.
Conclusion: Empowering Homeowners Through Technology
Choosing the right sewer camera for DIY inspections is an important decision that can significantly impact your home maintenance routine. By investing in a quality, user-friendly model that suits your needs and budget, you’re empowering yourself to take proactive control of your plumbing system’s health.
Remember, the key to successful DIY sewer inspections lies not just in having the right equipment, but also in developing the knowledge and skills to use it effectively. As you become more familiar with your sewer camera and your home’s plumbing system, you’ll gain confidence in your ability to identify and address potential issues before they become major problems.
We encourage you to share your experiences with sewer camera inspections on social media or home improvement forums. By doing so, you’ll not only document your own home maintenance journey but also help other homeowners make informed decisions about their plumbing health.
Take the plunge into the world of DIY sewer inspections, and discover the peace of mind that comes with knowing what’s really going on beneath your feet. Your future self (and your wallet) will thank you for it!