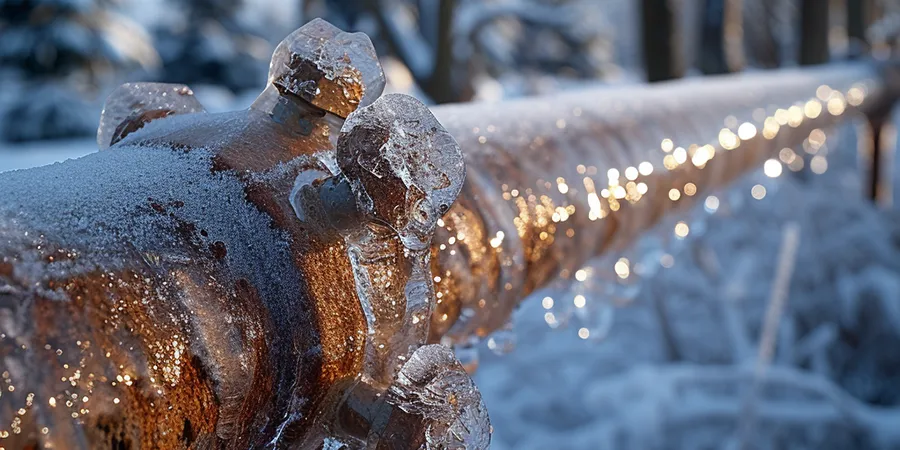
Winterizing outdoor pipes means draining and protecting every water line exposed to the cold — hose bibs, irrigation, pool supply, and any pipe running through an unheated space — before the first hard freeze. Water expands about 9% as it freezes, and a pipe that can’t give way splits under the pressure. A single burst supply line can release several hundred gallons an hour, and freezing is a leading, largely preventable winter insurance claim: water damage and freezing together make up 22.6% of homeowners insurance losses (Insurance Information Institute, 2023). The whole job is a fall afternoon’s work; this guide walks it step by step, with the code points that matter for exterior faucets.
Most likely to freeze (protect these first)
- Outdoor spigots / hose bibs — exposed, and often left with a hose attached that traps water in the faucet.
- Pipes in unheated spaces — garages, crawl spaces, attics, and runs along exterior walls.
- Irrigation and pool supply lines — usually the last lines anyone remembers to drain.
Core kit (details below)
- Pre-slit pipe insulation foam + insulation tape
- Insulated outdoor faucet covers
- Thermostatic heat tape/cable for the most exposed runs
- Caulk or spray foam to seal gaps where pipes enter the house
DIY cost vs. calling a pro
DIY winterizing supplies: $30–$80 · Thawing/repairing a burst pipe (pro): $150–$1,000+
If a pipe is already frozen or burst
Never thaw a pipe with an open flame or torch — that’s a fire risk and can burst the pipe. Shut off the water at the main valve, then warm the pipe gently (hair dryer, heat lamp, warm towels) starting at the faucet end and working back. If a pipe has already burst or you can’t reach it, leave the main off and call a licensed plumber.
The Science Behind Frozen Pipes: Why Winterizing Is Essential
Water is unusual: it expands as it freezes. That expansion puts enormous pressure on whatever contains it, and when the pressure exceeds what the pipe wall can hold, the pipe ruptures — often not at the ice plug itself but in the trapped, pressurized water between the ice and a closed faucet. The American Red Cross puts the danger zone at roughly 20°F for unprotected pipes, and wind chill along an exposed run makes it worse. That’s why the fix is both to remove the water (drain the lines) and to hold the remaining pipes above freezing (insulation and heat).
The plumbing code treats freezing as a design requirement, not an afterthought. It requires that water, soil, and waste pipes not be run outdoors, in attics, in crawl spaces, or concealed in outside walls where they’re subject to freezing unless they’re protected by insulation, heat, or both (IPC 305.4), and that buried water-service pipe sit below the local frost line. Winterizing is how you meet that same standard on the exposed fixtures the code can’t bury — your hose bibs and outdoor lines.
Essential Materials and Tools for Winterizing Outdoor Pipes
Proper winterization starts with the right materials. Here’s what you’ll need:
- Pipe insulation foam: pre-slit tubes that fit over pipes, sized to match different pipe diameters.
- Heat tape or heat cables: thermostatically controlled cable wrapped around a pipe to hold it above freezing. Buy a listed product and follow the instructions — heat tape is a documented fire hazard when misused, overlapped, or left on foam it isn’t rated for.
- Pipe insulation tape: to secure the foam and add a layer.
- Outdoor faucet covers: insulated domes that slip over exposed spigots — cheap and effective.
- Caulk or spray foam: to seal gaps where pipes pass through exterior walls.
- Shut-off valve access: know where the interior valve that feeds each outdoor faucet is, so you can isolate and drain the line.
- Freeze-proof (frost-proof) sillcocks: a worthwhile upgrade in cold regions — more on how they work below.
Frost-Proof Sillcocks and the Backflow Rule
A frost-proof (freeze-proof) sillcock moves the actual shut-off valve 6 to 12 inches back inside the heated wall, so the water stops deep in warm space and the exposed stub drains itself. It’s the best fix for a spigot that freezes every year — but it only works if you meet one condition: disconnect the hose. With a hose (or a splitter, or a quick-connect) left attached, water can’t drain out of the barrel, it stays in the frost zone, and a frost-proof sillcock will freeze and split just like an ordinary one. This is the single most common winterizing mistake.
Exterior hose connections also have a contamination rule. Any sillcock, hose bib, or wall hydrant must be protected by a vacuum breaker (IPC 608.16.4.2) so a submerged hose end can’t back-siphon dirty water into the drinking supply. Modern frost-proof wall hydrants build this in and are certified to ASSE 1019 (freeze-resistant, automatic-draining, with integral backflow protection); on an older spigot you can add a screw-on hose-connection vacuum breaker for a few dollars.
Timing: When to Begin Winterizing Outdoor Pipes
Do it in the fall, before hard cold arrives — a good trigger is when nighttime temperatures start to settle consistently below about 40°F (4°C). InterNACHI’s seasonal checklists put winterization firmly in the fall, ahead of snow and deep cold. Watch for these cues:
- First frost: frost on the lawn means it’s time.
- The forecast: a cold snap on the way — especially one nearing 20°F — means finish now.
- Consistent 30s°F nights: a clear sign winter is closing in.
Step-by-Step Guide to Winterizing Outdoor Pipes
Here’s the whole job at a glance — each step is detailed below.
- Shut off the interior valve feeding each exterior faucet, then open the faucet to drain it.
- Disconnect, drain, and store garden hoses indoors.
- Insulate exposed pipes with foam and secure it with tape.
- Add thermostatic heat tape on the most vulnerable runs.
- Fit insulated covers over outdoor faucets.
- Seal gaps and cracks where pipes enter the house.
1. Turn off and drain the exterior faucets. Find the interior shut-off valve for each outdoor faucet (often in the basement or crawl space) and close it. Then open the outdoor faucet and leave it open to drain the remaining water — this relieves pressure so any trapped water can’t freeze and split the line. Some interior valves have a small bleeder cap you can loosen to fully drain the stub.
2. Disconnect and store garden hoses. Remove every hose from every outdoor faucet — water left in a hose freezes, expands, and can damage both the hose and the faucet it’s attached to (and, as above, keeps a frost-proof sillcock from draining). Drain the hoses and store them indoors so they don’t go brittle.
3. Insulate exposed pipes. Measure the exposed runs, cut pre-slit foam insulation to length, slip it over each pipe so it fits snugly with no gaps, and wrap insulation tape around it to hold it in place and add a layer.
4. Add heat tape where needed. For the most vulnerable runs — long exposed pipe, unheated crawl spaces — wrap thermostatically controlled heat tape or cable, which switches on to keep the pipe above freezing. Follow the manufacturer’s instructions exactly: use a listed product, don’t overlap the cable on itself, and pair it only with insulation the tape is rated for, or you create a fire hazard.
5. Cover the outdoor faucets. With the faucet drained, fit an insulated faucet cover over each spigot for an added barrier. If you have older spigots that freeze, upgrading to freeze-proof (ASSE 1019) hose bibs is the durable fix.
6. Seal gaps and cracks. Inspect where pipes pass through exterior walls, foundations, and into crawl spaces, and seal gaps with caulk or spray foam. This keeps freezing air off the pipes and cuts drafts and energy loss at the same time.
Long-Term Maintenance Through the Winter
Winterizing isn’t one-and-done. Through the cold months:
- Check the insulation and heat tape periodically — re-secure any foam that has slipped, and confirm heat tape is still powered and working.
- Watch for leaks or drips at faucets and pipes; even a small leak becomes a big problem in freezing conditions.
- Open cabinet doors under sinks on exterior walls on very cold nights, so household heat reaches the pipes.
- Keep the heat on at a steady temperature even when you’re away — and never let the house drop to freezing to save on heating.
- Let a faucet drip during an extreme cold snap. A slow trickle relieves the pressure that actually bursts a pipe (it’s the trapped pressure, not the ice alone, that does the damage) — the American Red Cross recommends this for pipes at risk.
FAQs
-
How can I tell if my outdoor pipes are at risk of freezing?
If you live in an area with temperatures that drop below freezing, especially overnight, your outdoor pipes are at risk. Pipes located in unheated areas like garages, crawl spaces, and attics are particularly vulnerable. Signs that your pipes may be at risk include visible frost on the pipes, reduced water flow, or strange sounds when turning on faucets.
-
Is it necessary to winterize pipes if my home has never had a burst pipe?
Yes, it’s essential to winterize outdoor pipes even if you’ve never experienced a burst pipe before. Winterizing is a preventative measure that protects your home from the potential dangers of freezing temperatures. Just because you haven’t had an issue in the past doesn’t mean you’re immune. One severe cold snap could change that.
-
Can I use alternative insulation materials if I don’t have pipe insulation foam?
While pipe insulation foam is the most effective material, you can use alternatives like fiberglass pipe wrap or even old towels or blankets in a pinch. However, these alternatives may not provide as much protection, especially in extremely cold climates. It’s best to invest in proper insulation materials designed specifically for pipes.
-
What should I do if I suspect a pipe has frozen?
If you suspect a pipe has frozen, first locate the pipe and turn off the water supply to that area to prevent any potential bursts. Then, try to gently thaw the pipe using a hairdryer or heat lamp, starting at the faucet and working your way back along the pipe. Do not use open flames or extreme heat sources, as this can damage the pipe and create a fire hazard. If you’re unable to thaw the pipe, or if it has already burst, contact a professional plumber immediately.
Conclusion: Winterizing Your Pipes Is a Must
Winterizing outdoor pipes is a short, cheap job that heads off one of the most common and expensive winter claims. Drain and isolate the exterior faucets, disconnect the hoses (so even a frost-proof sillcock can drain), insulate and add heat where it’s needed, and seal the gaps that let cold air in. Do it in the fall, check it through the season, and your outdoor plumbing will ride out the cold without a split line or a flooded room.
Sources & verification
- Preventing and thawing frozen pipes; the ~20°F at-risk threshold, dripping a faucet, open-cabinet guidance, and never using an open flame to thaw — American Red Cross — Frozen Pipes.
- Water, soil, and waste pipes in exterior walls, attics, crawl spaces, or other freezing-prone locations must be protected by insulation, heat, or both; buried water-service pipe must sit below the frost line (IPC 305.4, Freezing) — International Plumbing Code 2021, Chapter 3 — General Regulations (via UpCodes).
- Sillcocks, hose bibs, and wall hydrants must be protected by a vacuum breaker against back-siphonage (IPC 608.16.4.2); frost-proof wall hydrants are certified freeze-resistant, automatic-draining, and backflow-protected under ASSE 1019 — International Plumbing Code 2021, Section 608.16.4 — Protection by a Vacuum Breaker (via UpCodes).
- Water damage and freezing accounted for 22.6% of homeowners insurance losses (2023) — Insurance Information Institute.
- Seasonal home winterization checklist — InterNACHI.
Last verified: Jul 2026