Think of your home as a fortress, standing strong against the onslaught of winter’s icy winds, snow, and freezing temperatures. The outdoor pipes are like the vulnerable gates of this fortress. Without proper protection, these gates can easily succumb to the relentless pressure of freezing water, leading to catastrophic failures. Just as a commander would reinforce the gates of a castle before a siege, you must winterize your outdoor pipes to protect your home from winter’s cold wrath.
In the United States, the risk of pipe bursts during winter is a significant concern, with an average repair cost of $5,000 or more per incident. According to the Federal Emergency Management Agency (FEMA), burst pipes are among the leading causes of water damage in homes during winter months. This guide will equip you with the knowledge and tools needed to safeguard your pipes and, by extension, your home.
The Science Behind Frozen Pipes: Why Winterizing Is Essential
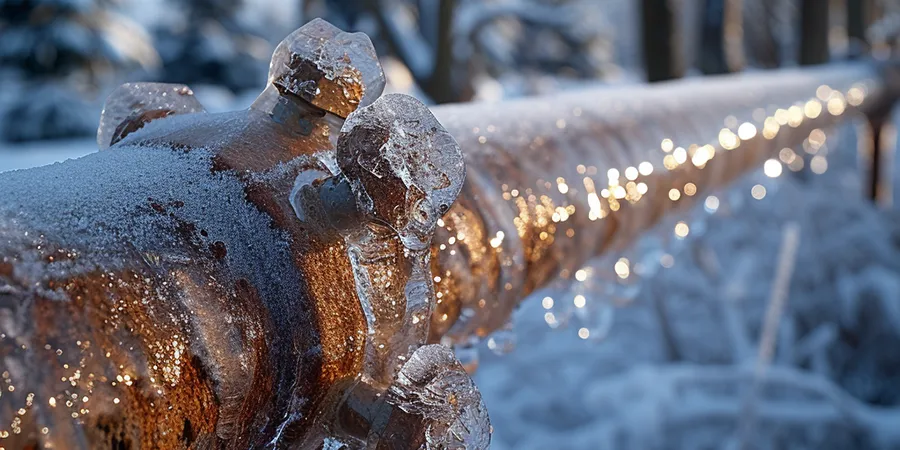
Before diving into the steps for winterizing outdoor pipes, it’s important to understand why this process is so crucial. Water, unlike most substances, expands when it freezes. This expansion puts enormous pressure on whatever contains it, including metal or plastic pipes. When the pressure becomes too great, the pipe can rupture, leading to leaks, flooding, and costly repairs.
In areas with heavy snow, ice accumulation, and freezing temperatures, pipes are at even greater risk. The combination of wind chill and ambient cold can cause pipes to freeze more quickly than in milder climates. This makes it imperative to winterize outdoor pipes before the first freeze hits.
Essential Materials and Tools for Winterizing Outdoor Pipes
Proper winterization starts with the right materials and tools. Here’s a comprehensive list of what you’ll need to ensure your outdoor pipes are protected:
- Pipe insulation foam: These pre-slit tubes are designed to fit over pipes, providing a protective layer against cold temperatures. They’re available in various sizes to match different pipe diameters.
- Heat tape or heat cables: Thermostatically controlled heat tapes or cables can be wrapped around pipes to maintain a consistent temperature, preventing freezing.
- Pipe insulation tape: Use this to secure the foam insulation in place and add an extra layer of protection.
- Outdoor faucet covers: These insulated covers protect exposed spigots from freezing. They’re an inexpensive yet effective way to safeguard faucets.
- Caulk or spray foam: For sealing gaps and cracks around pipes where cold air might seep in.
- Shut-off valve key: Essential for turning off water to outdoor faucets and draining the lines.
- Hose bibs: Freeze-proof models are a smart investment for areas prone to severe cold.
Having these materials on hand before winter begins ensures you can act quickly and efficiently when the time comes to winterize your outdoor pipes.
Timing: When to Begin Winterizing Outdoor Pipes
Knowing when to start the winterization process is just as important as knowing how to do it. The best time to begin is in the fall when temperatures start to consistently drop below 40°F (4°C). It is usually performed in the fall before snow and excessive cold have arrived. This early preparation gives you a head start before freezing conditions set in.
Signs to Start Winterization:
- First Frost: If you wake up to frost on your lawn, it’s time to start winterizing.
- Weather Forecasts: Pay attention to long-term weather predictions. If a cold snap is expected, begin winterizing immediately.
- Temperature Drops: Consistent nighttime temperatures in the 30s°F (1-4°C) are a clear indicator that winter is approaching.
By beginning early, you reduce the risk of being caught off guard by a sudden freeze.
Step-by-Step Guide to Winterizing Outdoor Pipes
1. Turn Off Water Supply to Exterior Faucets:
- Locate the shut-off valves for your outdoor faucets, usually found in the basement or crawl space.
- Use a shut-off valve key to turn off the water supply to these faucets.
- After shutting off the water, open each exterior faucet to drain any remaining water. This step is crucial as it relieves pressure and prevents any trapped water from freezing and causing the pipe to burst.
2. Disconnect and Store Garden Hoses:
- Remove all garden hoses connected to outdoor faucets. Water left in hoses can freeze, expand, and cause damage not only to the hose but also to the connected faucet.
- Store the hoses indoors to prevent them from becoming brittle and cracked during the winter months.
3. Insulate Exposed Pipes:
- Measure and Cut Insulation Foam: Start by measuring the length of all exposed outdoor pipes, including those leading to exterior faucets. Cut the pipe insulation foam to match these measurements.
- Apply the Foam Insulation: Slip the pre-slit foam insulation over each pipe. Make sure the insulation fits snugly, covering the entire length of the pipe without gaps.
- Secure with Insulation Tape: Once the foam is in place, wrap pipe insulation tape around it to keep it secure. This not only keeps the foam from slipping but also adds an extra layer of insulation.
4. Use Heat Tape for Additional Protection:
- Wrap Pipes with Heat Tape: For pipes that are especially vulnerable to freezing, such as those in unheated areas, wrap them with heat tape or cables. These are thermostatically controlled to maintain a constant temperature, ensuring the pipe stays above freezing.
- Follow Manufacturer Instructions: Carefully read and follow the manufacturer’s instructions when installing heat tape to avoid any safety hazards, such as overheating.
5. Protect Outdoor Faucets with Covers:
- Install Faucet Covers: Once the water supply to the faucets has been turned off and drained, install outdoor faucet covers. These insulated covers fit securely over the faucet, providing a barrier against freezing temperatures.
- Consider Upgrading to Freeze-Proof Faucets: If you have older faucets, upgrading to freeze-proof hose bibs is a worthwhile investment. These are designed to prevent water from freezing within the faucet.
6. Seal Gaps and Cracks Around Pipes:
- Inspect for Gaps: Look for any gaps or cracks where pipes enter your home. These are often found around exterior walls, foundations, and crawl spaces.
- Seal with Caulk or Spray Foam: Use caulk or spray foam to seal these gaps, preventing cold air from infiltrating your home and freezing your pipes. This step also helps improve your home’s overall energy efficiency by reducing drafts.
Long-Term Maintenance Tips for Outdoor Plumbing Systems in Winter
Winterizing your outdoor pipes is not a one-and-done task. Proper maintenance throughout the winter is essential to ensure your plumbing remains protected, especially in areas with prolonged cold spells.
Regular Inspections
- Check Insulation: Periodically inspect the foam insulation and heat tape to ensure they are secure and intact. If the insulation has shifted or come loose, readjust and re-secure it immediately.
- Look for Leaks: During your inspections, check for any signs of leaks or drips from faucets or pipes. Even small leaks can lead to significant issues in freezing conditions.
Keep Pipes Warm
- Open Cabinets: On particularly cold nights, open the cabinets under sinks located against exterior walls to allow warm air to circulate around the pipes.
- Maintain Indoor Temperatures: Keep your home’s thermostat at a consistent temperature, even when you’re not home. This helps maintain a warm environment for your pipes.
Drip Faucets During Extreme Cold
- Let Faucets Drip: During extreme cold snaps, allowing faucets to drip slightly can prevent the pipes from freezing. The continuous movement of water, even at a slow trickle, can stop ice from forming within the pipes.
Monitor Your Home’s Heating System
- Regular Maintenance: Ensure your heating system is well-maintained and functioning efficiently. A reliable heating system is critical in keeping indoor temperatures stable, which in turn protects your pipes from freezing.
- Backup Heating Options: Consider having a backup heating source, such as portable space heaters, available in case your primary system fails during a cold spell.
FAQs
-
How can I tell if my outdoor pipes are at risk of freezing?
If you live in an area with temperatures that drop below freezing, especially overnight, your outdoor pipes are at risk. Pipes located in unheated areas like garages, crawl spaces, and attics are particularly vulnerable. Signs that your pipes may be at risk include visible frost on the pipes, reduced water flow, or strange sounds when turning on faucets.
-
Is it necessary to winterize pipes if my home has never had a burst pipe?
Yes, it’s essential to winterize outdoor pipes even if you’ve never experienced a burst pipe before. Winterizing is a preventative measure that protects your home from the potential dangers of freezing temperatures. Just because you haven’t had an issue in the past doesn’t mean you’re immune. One severe cold snap could change that.
-
Can I use alternative insulation materials if I don’t have pipe insulation foam?
While pipe insulation foam is the most effective material, you can use alternatives like fiberglass pipe wrap or even old towels or blankets in a pinch. However, these alternatives may not provide as much protection, especially in extremely cold climates. It’s best to invest in proper insulation materials designed specifically for pipes.
-
What should I do if I suspect a pipe has frozen?
If you suspect a pipe has frozen, first locate the pipe and turn off the water supply to that area to prevent any potential bursts. Then, try to gently thaw the pipe using a hairdryer or heat gun, starting at the faucet and working your way back along the pipe. Do not use open flames or extreme heat sources, as this can damage the pipe and create a fire hazard. If you’re unable to thaw the pipe, or if it has already burst, contact a professional plumber immediately.
Conclusion: Winterizing Your Pipes Is a Must
Winterizing outdoor pipes is a critical task for homeowners in cold climates. By understanding the science behind frozen pipes, gathering the necessary materials, and following a thorough step-by-step process, you can protect your home from costly water damage. Regular maintenance and vigilance throughout the winter months will further ensure your plumbing system remains intact and functional.
Don’t wait for the first freeze to act—start winterizing your outdoor pipes today. Protect your home, save money, and enjoy the peace of mind that comes with knowing your plumbing is prepared for whatever winter throws its way.